Sugarworks Blog

Chef Mitchie's Diary of a Brush Fiend
Michelle Curran aka “Chef Mitchie”, is a self-taught cake and sugar artist originally from Atlantic City, NJ now based in Las Vegas, NV. Nicknamed the “Femme Fatale of Fondant”, by NV Pageant Magazine and BEST CAKE ARTIST by Las Vegas Weekly Readers, her career in cake artistry has led her to compete locally, as well as nationally on Food Network, making her an award winning cake artist. Her truest passion as a Private Cake Artist for hire is creating custom cake and sugar art for her clients, which have included World Renowned DJs, celebrities, and athletes; it keeps her nestled inside her Las Vegas studio when she is not traveling the nation performing product demos and teaching the craft of cake decorating.

Mitchie is often referred as a product expert for top cake decorating supply companies and has designed food-grade silicone molds for Decorate the Cake. Today Mitchie admits to her Paintbrush Problem, and tells us all about her new fixation: Innovative Sugarworks Artists' Brushes.
Hi, my name is Mitchie, and I'm addicted to buying paintbrushes. :: Hi Mitchie! ::
It's a serious condition. I tend to blow out bristles faster than I can unpackage brushes. I'm quite neglectful to my brushes, but not on purpose. Cake artistry changes in the blink of an eye, it's fast paced, you have a change of heart on design in mere seconds, or you take your sweet lovin' time to nurture the project in front of you. What happens to your brushes?

The right answer would be to clean them right away! But nope, they're still sitting in clean water conforming to the cup's bottom or you find the one you used for piping gel stuck to the underside of your work bench...how? So what do I do?!
Innovative Sugarworks launched an incredibly sassy looking set of Artist Brushes; we need to take a serious moment to admire them.

The bristles are so soft, you will want to rub them on your face. Go ahead, I won't tell anyone. (OK, stop flirting with your brushes Mitchie.)
For the first time use, I baby-ed them... hardcore, rinsed immediately, soft towel dried. Stood them upright to dry. But then I got busy. Soon I was out the door for a delivery, and by the time I was done with traffic I just wanted to eat some noodles and go to bed. The next day I rolled my eyes in my head as I saw my brand new brushes were still covered in paint and powders on my workbench.

At least my Deluxe Oval was sitting in clean water. But the Precision Crease brush had a near permanent helmet of edible glue. Curses.

Success! The brushes cleaned really well and are now back to their former gorgeous condition.

These brushes perform really well, no shedding, which is super important for food! I highly recommend at least 2 sets; one to dedicate to dry brushing. I wouldn't suggest leaving them around for days unkempt, not everyone will have the same experiences. But overall, I am really pleased to have them join my arsenal of cake tools.
Check out this quick vid and watch me use the brushes, Sugar Shapers, and Artists' Turntable!
We hope you enjoyed Chef Mitchie's entertaining exploration of our new Artists' Brushes. We certainly did! If you want to see more of Chef Mitchie's incredible work, you can visit the Mitchie's Munchies website.
Or follow her on social media!
Facebook: MitchiesMunchies
Instagram: @chefmitchiesmunchies
Twitter: @Mitchies13

Gluten-Free Mochonut Cookies
We're on a coconut kick this month at Sugarworks! We don't know if it's the warm, sunny weather putting us in a tropical mindset, or if it's just how great the kitchen smells when coconut is cooking, but we can't get enough lately.
Today, we're packing all the coconut we can into these Gluten-Free "Mochonut" Cookies! Enjoy!

Ingredients
- 1/2 cup coconut oil
- 1 cup sugar
- 3 tbsp instant coffee
- 1/4 cup coconut milk
- 1 tbsp ground chia seeds
- 3 tbsp water
- 1 tsp pure vanilla extract
- 1 tsp salt
- 1/2 tsp baking soda
- 1/2 tsp baking powder
- 4 oz melted chocolate
- 1 1/4 cup coconut flour
- 1/2 cup shredded coconut
First, let's do a little prep work. Mix your ground chia seeds in the 3 tablespoons of water, and let this sit for at least 5 minutes.
Did you ever have a Chia Pet? Do you remember soaking the chia seeds to get them gooey enough to stick to your "pet"? That's essentially what we're doing here. Without the binding element of wheat gluten, our coconut flour tends to make a pretty crumbly cookie. We're going to need the "goo" of the chia seeds to help keep them together. Using ground seeds instead of whole ones will yield a thicker goo. I let mine sit for 10 minutes for optimal goo-ing.
Preheat your oven to 375° fahrenheit.
Now, cream the coconut oil, sugar, and instant coffee together. Stir in the coconut milk, chia seed goo, and vanilla extract. Then add the melted chocolate and mix well.

I used 63% dark chocolate for this recipe. Unsweetened baking chocolate works fine as well. Let your preference for sweetness and bitterness determine the cocoa content of your chocolate. Just remember- there's already sugar in the cookies, so don't go too sweet with your chocolate.

Next, stir in the remaining dry ingredients: salt, soda, powder, and coconut flour. Mix well, making sure the coconut flour gets thoroughly blended into the dough.
Shape the dough into 1 1/2" balls and roll in the shredded coconut for a coating. Place on a baking sheet and bake for 15 minutes.

Few things make your kitchen smell as wonderful as the mingling aromas of warm chocolate and baking coconut. That alone is reason enough to give these delicious treats a try!
But if you need more convincing, there's also the many health benefits of incorporating coconut oil into your regular diet. Coconut oil is high in "good fats"- the ones that help your body increase its levels of healthy cholesterol and convert unhealthy cholesterol (LDL) into the good kind (HDL). The fatty acids in coconut oil have anti-microbial and anti-fungal properties, helping your body fight bacteria and infection. Coconut oil has also been linked to increased levels of energy and endurance.

We won't go so far as to call cookies a health food, but substituting coconut for your ordinary ingredients might be one way to get some of those beneficial components into your diet. One delicious, decadent, indulgent way.

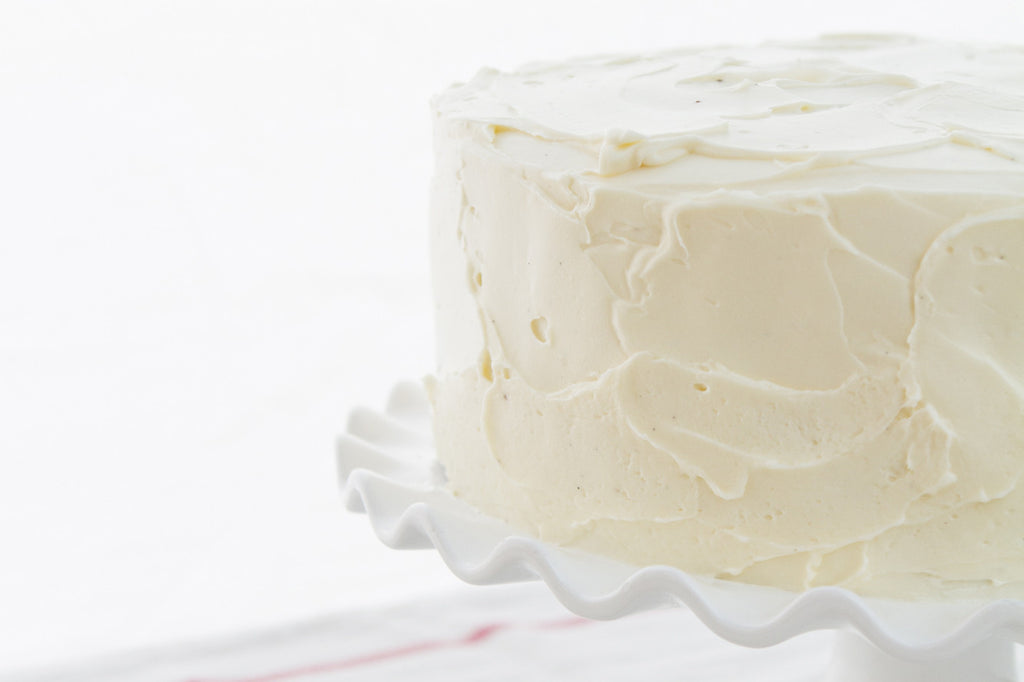
Kaysie's Coconut Milk Cake
We hate to call a natural, healthy fruit a "fad food", but coconuts have certainly gained in popularity recently. Whether due to purported health benefits ranging from improved immune system function to heart disease risk reduction, or simply because they taste delicious, coconuts are definitely the flavor du jour.
Today we're bringing this delicious superfood into cake. Because that's what we do- we find a thing we love and we cake it.
Ingredients
- 170g Cake flour
- 234g Sugar
- 9g Baking powder
- 2g Salt
- 113g Butter, unsalted
- 120g Coconut Milk
- 76g Egg whites
- 57g Whole milk
- 4g Vanilla extract
- 2g Coconut extract
- 75g Shredded coconut
These measurements will yield two 8" round cakes. For larger cakes, scale up according to your needs.

Directions
First, combine all dry ingredients, including the sugar, in a mixer. Add the softened butter and coconut milk to the dry ingredients and beat on a low speed until combined. Raise the speed to medium and beat for 4 minutes.

In a separate bowl, combine the egg whites, whole milk, and extracts. Slowly add this wet mixture to your batter, scraping well as you go.
Add the shredded coconut and mix to combine.

Bake at 325° fahrenheit until the top starts to golden and a toothpick comes out clean. Start checking your cake at around 30 minutes.
Enjoy the delectable flavor of coconut in its most indulgent form! And hey- maybe it'll even cure what ails you!


Lobster Claws by Dat Cake Place
Jockan Jordan is the owner and founder of Dat Cake Place in New Orleans, LA. With a background in architecture and interior design guiding his artistry, Jockan has made a name for himself as a creator of stunning sculptural cakes featuring vivid colors and movement.

A self-taught artist with no formal culinary training, Jockan has rocketed to cake fame with appearances on television shows like Food Network's Cake Wars and WGNO 26's News With A Twist, features in publications like Cake Masters, The Times Picayune, and Nola.com, and participation in cake competitions as both a winning competitor and a judge. He's even made an edible dress worn by a runway model on Battle of the Instructors in Jacksonville, FL.
Today, Jockan is showing us how he made these incredibly realistic lobster claws using fondant and Sugar Shapers.
First, start of with a ball of fondant. Roll it into a drumstick shape.
Now, flatten the larger side of the drumstick. Take your Exacto knife and cut an L shape out of the flat side- one split down the center of the flat side and one cut from the edge to the center, creating an L shape. 
Set aside the small piece that is cut out. It will be used later for the bottom claw.
Next, use your Bone Chisel Sugar Shaper (the orange one) and create a well in the claw by pressing the shaper into the area where you removed the smaller piece of fondant.
Now, take the palm of your hand and further flatten the outside edge of the flattened piece and the inside edge of the flattened piece where you cut your L shape. Do the same thing to the small piece that was cut out of the L shape- flatten the inside and the outside edge.
Next, take the yellow Square Tip Chisel and make the claw teeth by pressing individual lines into the inside edge of your claw.
Do the same to the inside of the small piece that you cut out of the L shape, which will be the bottom portion of your claw.
Now take a little dab of water on a brush and pat inside the hole that was created on inside of the claw and insert the bottom portion of the claw that was cut out. Take the Tri-Tip Sugar Shaper and make a v shape indention in the long portion of the claw. Set that aside for a second. 
Now take a small ball of fondant. Roll it out into a bean shape- one end slightly smaller than the other. On the smaller side, Press down to semi -flatten.
On the larger side, take the orange Sugar Shaper and make a well. Make sure the well is large enough to attach to the elongated portion of the claw.
Dab a little bit of water on the inside of the well , and attach that piece to the bottom of the claw. And there you have it!!
I would then air brush the top portion of the claw, leaving the bottom fairly white. I add a little darker color in the indentions and where everything connects to give it a little more realism.
I hope this was extremely helpful and fun!! If you try out this lobster instructional, I would love to see the results! Please send me your photos!!
We hope you enjoyed this tutorial by Jockan Jordan of Dat Cake Place. Keep up with Jockan's latest creations on his social media pages:
You can also catch Jockan live at Sweetfest Con in Atlanta, GA September 21 - 24, 2017 and at Confetti Fest Cake Show in Seattle, WA October 5 - 8, 2017.
The Fine Art of Sculpting Cake
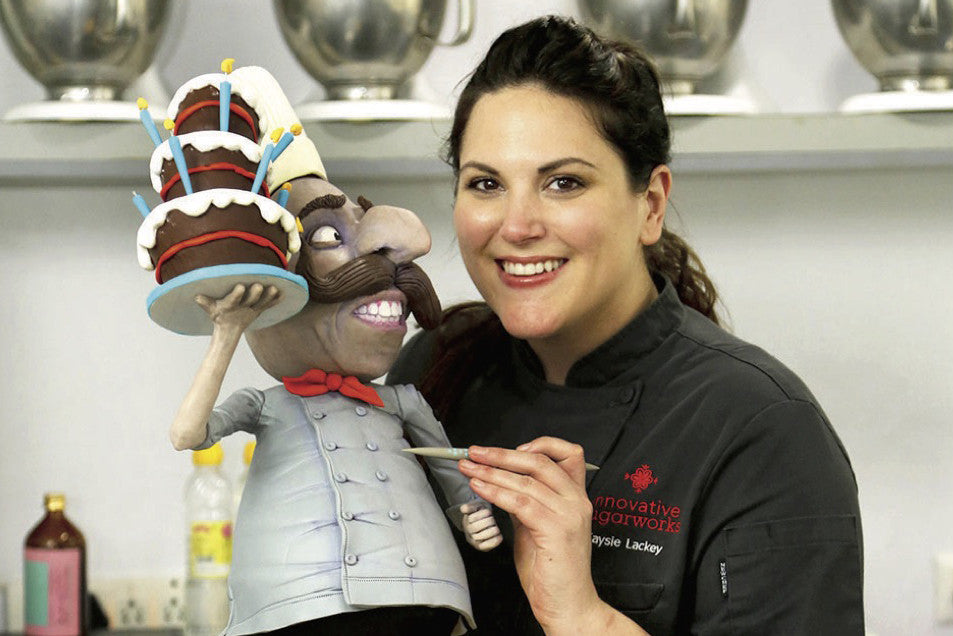
Kaysie Lackey was recently featured in the Bangalore Mirror while she was in India teaching classes on her famous sculpted character cakes. You can read the full text of the article below the image.

Celebrated pastry chef Kaysie Lackey, who was in the city to teach a class, talks about what inspires her quirky designs
Shivani Kagti mybangaloremirror @timesgroup.com
TWEETS @BangaloreMirror
At a cake decorating class that American pastry chef Kaysie Lackey was conducting at Lavonne Academy of Baking Science & Pastry Arts recently, the students were quite bemused when their instructor stuffed a cushion under her chef’s coat and strutted around with her fake belly protruding out. They were in the middle of constructing one of Lackey’s famous sculpted cakes – a Tim Burton- esque character called Higgins who was standing, quite miraculously, on one fondant covered leg while balancing a three-tiered mini cake on a platter. The grey-faced Higgins, incidentally one of Lackey’s favourite cake characters, was a pot-bellied chef and Lackey wanted her students to carve the creases around his tightly-buttoned chef coat as realistically as possible. Lackey was using her stuffed cushion belly as a model.
A self-taught pastry chef, who has proved her mettle on reality shows such as Cake Wars and Last Cake Standing, Lackey was named one of Martha Stewart’s top 63 pastry professionals in 2014. In 2015, she made it to Dessert Professional magazine’s Top 10 Cake Decorators in North America.
But allude to her celebrity status and Lackey laughs it off with “I am cake-famous...only cake nerds know me”. Nonetheless, it’s truly surprising that Lackey never attended culinary school. Other than a handful of basic baking classes, the 36-year-old went through dozens of recipes and picked up her skills through trial and error. “There were no YouTube videos or online tutorials back when I started out (about 10 years ago) so you just had to just figure it out yourself.”
What did help her out though was her background in fine arts and sculpture. Before she found her calling as a cake artist, Lackey had completed a four-year Bachelor’s degree in Fine Arts at Belmont University, Nashville, which gave her grounding in studio art, art history and painting. However, realising that she couldn’t hack it as a “starving artist”, Lackey decided to switch gears and moved to New York to work as a make-up artist in the fashion industry. Four years later, she found herself getting fed up of her routine and was looking for a change. “I remember watching these cake shows on the Food Network channel, and I just got it into my head to try and make one for my older sister’s birthday (with whom she was living in NY). From that point I started doing cakes for friends. And I realised that I enjoyed it.” The turning point, however, came when Lackey made a Chanel bag cake for a friend which went to a posh restaurant in NY. “I left about 15 business cards at the restaurant just in case anyone was interested and I got some 30 enquiries after that,” recalls Lackey, who then realised that she had a chance at a new career. She moved back to Nashville to start her business and her mother, who she describes as an “old-fashioned Southern cook”, became her apprentice. This was about nine years ago. Today, of course, Lackey is known for her gravity-defying cakes. She also established her bakery The People’s Cake in Seattle, where she’s currently based, but lately, her focus has been solely on conducting classes. “Now, I only take about 5-6 wedding cake orders on a special case basis. I usually travel about six months in a year taking classes.”
Having travelled to 31 countries, including India this year, Lackey enjoys this part of her job tremendously – despite having to lug up to 230kg of pastry equipment. Pointing to an open black suitcase piled high with Sugar Shapers, colour dust, pastry knives and innumerable odds and ends that look like they came out of a hardware store, Lackey tells us how she’s often pulled up at airport security for her bottles of powdered food colours (“they probably think I am trying to smuggle drugs”). She also shares a list of ingredients with the organisers from the host institute that, more often than not, runs into five pages. “In different countries the raw ingredients vary greatly so part of the challenge is to figure out the right quantities and recipes. In India, for instance, there’s compound chocolate which is very different from the modelling chocolate that I work with.”
At Lavonne, where Lackey conducted three cake decorating classes – one for Higgins, another one where they made a cute Koala bear sitting on a branch and a three-hour demo class on the A-Z of cake modelling – about 33 people attended. Right from making the metal frame or the “skeleton” for the cake to the “flesh” or vanilla sponge cake and chocolate ganache filling and the “skin” or fondant covering – students had to make everything from scratch. While Higgins was a three-day class (students spent an entire day on the face – “getting proportions right is a challenge,” as Lackey explains), Koala was a two-day class. With her years of experience though, Lackey can finish a Higgins cake in eight hours.
"I am lucky that I came about this organically. I have taught myself and learnt through mistakes which meant that I was never rigid about how to do things." –Kaysie Lackey
When she’s not away conducting classes, Lackey is busy sketching new ideas for her cake characters. From a green alien creature to Alice in Wonderland-themed cakes and tattoo-inspired cakes, Lackey loves to experiment with unconventional ideas. “I love my characters to have a sense of humour. Otherwise, after a decade of doing this, I would suffer from cake burnout,” says the vivacious pastry chef with a laugh.
Reminiscing how at age 11 she broke her mother’s cake mixer when she botched up a cookie dough recipe, Lackey’s story is truly inspirational. Calling her career as a pastry chef, “a hobby run amok”, she adds, “I am really lucky that I came about this so organically. I have taught myself and learnt through mistakes which meant that I was never rigid about how to do things.” In fact, in many of her classes, Lackey would show students pictures of the first cake she made for her sister as an example of how everyone has to make a start somewhere! “I love it when a student in my class makes a mistake – it allows everyone to learn something valuable.” Heartening words, indeed, for amateur bakers who are learning the ropes the hard way.
SANJAY MD
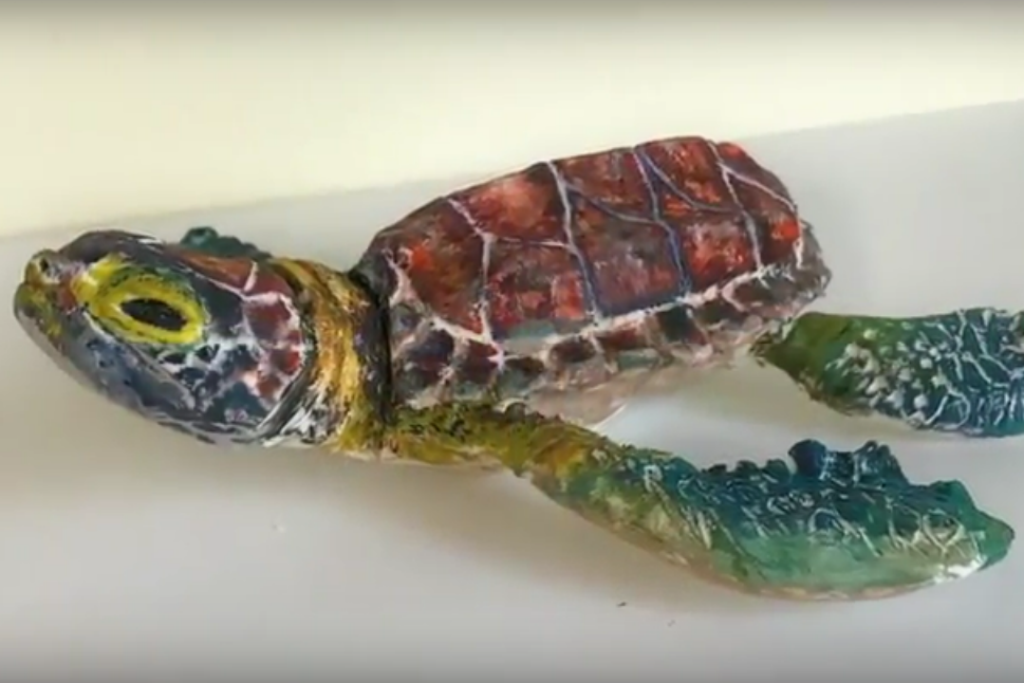
Liz's Turtle Baby
Liz Kraatz is the mastermind behind Liz's Cake Art in St. Louis, MO. Liz has been running her design studio for 6 years and has made a name for herself as a skilled sculptress, teacher, and creative artist. Today, she's going to show us how she uses Sugar Shapers for her detailed, realistic sculptures.

I started my business, Liz’s Cake Art, about six years ago and I really wish I would have these Sugar Shapers from the beginning. These tools make my sculpted cakes much more realistic and accurate.

I love each tool for a different reason, but I can say I use the firm and the soft tips equally. My Sugar Shapers give me the ability to get those super fine details that other sculpting tools can not achieve.

I’ve created this sculpted baby sea turtle and you can find this little cutie as part of Liz Marek's mermaid installation at the SoFlo Cake and Candy Expo in Miami, Florida, April 28-30! This turtle required very fine details in the shell, skin, and head. Thanks to my Sugar Shapers, they were easily achieved!

I put together a time-lapse video to show you how I used each tool and to show what amazing things you can create with the most innovative sugar sculpting tools available… the Sugar Shapers!
Find more videos on my YouTube channel, Liz’s Cake Art
Instagram: @lizs_cake_art
Facebook: Liz’s Cake Art
We hope you enjoyed this baby sea turtle by Liz Kraatz. If you decide to make your own baby turtle, Liz would love to see them! Email photos, or post them to social media and tag Liz's Cake Art and Innovative Sugarworks!

Kaysie's Carrot Cake
After we posted this sumptuous photo of a slice of Kaysie Lackey's carrot cake on Facebook, we got a bunch of requests for the recipe. Well, we love to make you happy, so here it is!
This recipe makes two 8" cake rounds. For more layers, scale up the ingredient measurements accordingly.

Ingredients
- 397 grams sugar
- 283 grams vegetable oil
- 200 grams eggs
- 200 grams cake flour
- 160 grams all-purpose flour
- 12 grams baking powder
- 2 grams baking soda
- 5 grams ground cinnamon
- 2 grams ground nutmeg
- 2 grams salt
- 410 grams shredded carrots

First, combine the sugar and oil. Then add the eggs and mix well.

Next, sift all the dry ingredients.
Then toss the carrots with 1/3 of the dry ingredients. Add the remaining dry ingredients to the sugar mixture and mix until combined. Add the carrots and stir until just combined.
Bake at 325 degrees until cake is fully baked, but still moist.
Enjoy!

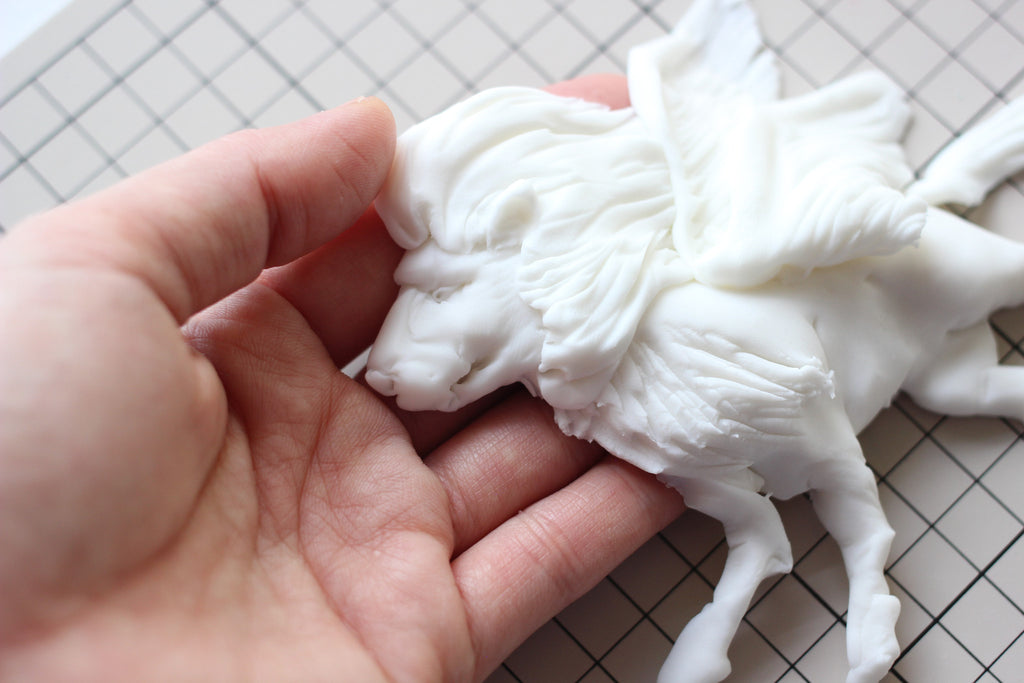
March Comes in Like a (flying) Lion!
Sachiko Windbiel of Mimicafe Union is a marvel at creating whimsical and playful figures. For if March is alleged to come in like a lion, why shouldn't it be a flying lion?
Watch her bring this fantastic beast to life using Sugar Shapers in this short video:
Sachiko uses firm-tipped Mini-Tip Sugar Shapers for this figure. In the pictures below you can see how different shapes on the lion were made by different chisels in the Sugar Shaper set.
 The green, or Round Tip Chisel is perfect for shaping the hooves.
 The Pointed Tip Chisel is ideal for drawing in details like the mouth and eye, while the orange, or Bone Chisel, is great for modeling head shapes and giving form.
We hope you've enjoyed this flying lion! You can watch more videos of Sugar Shapers in use on our YouTube channel! And you can follow Sachiko on the Mimicafe Union Facebook page!
Sachiko Windbiel's Human Hands
Sachiko Windbiel grew up in Japan and relocated to New York in 2008 to attend culinary school. While originally specializing in vegetarian and healthful food trends, the charm and whimsy of sugarcraft eventually won her over.
Sachiko now runs Mimicafe Union in New York City and has made a name for herself as a master of edible art. With a style that is cute, light-hearted, and fun, Sachiko is most recognized for her fondant figures and cake toppers.

Today she is going to teach us how to make convincingly realistic human hands using fondant and Sugar Shapers!
Life Like Fondant Hand Step By Step Tutorial
My work is all about Fondant Figures… my main tools are my fingers, but thanks to Sugar Shapers, I was able to realize some fun new techniques!
Let's get started!
First, we need to color the fondant. It's best to start with white fondant and add color so that you can get exactly the tone you want. Color a handful of fondant to the skin tone that you would like by adding AmeriColor Gel Color. I use AmeriColor Flat Gold Gel Color.

Once you have a color you like, shape the Fondant into a form resembling a wooden spoon as shown.
Using your own hand as a model, cut the fingers in the fondant wooden spoon with an X-Acto Knife. Then, smooth out the squareness of the fondant fingers by smoothing and shaping them with your own fingers.
Now let's start using our Sugar Shapers to add shape and contour to our hand. Use the Orange/ Bone Chisel Sugar Shaper to create web area between each finger by pressing inward toward the wrist with the edge of the shaper. Then, use the same Bone Chisel tool to push up small mounds of fondant to create knuckles. Smooth the knuckles with your fingers to keep them looking organic.
Next, use the Light Blue / Pointed Chisel to create the wrinkle lines of the middle joint on the back of the fingers. Then use the Green/ Round Tip Chisel tool to gently press down on the fondant at the end of each finger to create the nail beds.
Now, add a little bit of Red AmeriColor Gel to some excess skin toned fondant to create a pinker tone for the nails. Pinch a ball of this pinker fondant, place it on the nail bed and smooth it into place with your fingers. Use the Green/ Round Tip Chis to add definition to the shape of the nail.
Use your fingers to add body / muscle tone and roundness to the fondant fingers. Then use the edge of your Pointed Chisel to lightly indent lines on the back of the hand to indicate the hand’s bone structure.
To create shadows and depth on the hand, use Petal Color Dust. I combined Light Brown Dust with a little bit of Pink Dust- you can test the dust tone on some spare fondant to make sure you are getting the color you want. Once you have your desired color, just touch the brush to the main knuckles and to the mid finger joints. Also touch the brush along the back of the hand structure lines and on the side of the fingers to add tone. 
If you would like to create interesting positioning of the fingers, place the fingers on your shapers in whatever positions you would like them to have. Then, allow to dry. You can also use just a touch of confectioner’s glaze to add a sheen to the fingernails. 
The fondant dries quickly. If you would like to add more life-like wrinkles to the fingers, you can very gently bend the fingers a little bit after they have dried out some.
And there you have it! A life-like human hand made of fondant!
Sugar Shapers are wonderful tools for creating many exciting details, textures, and forms. Adding realism to your creations is a pinch with these tools in your kit.
![]()
We hope you've enjoyed this tutorial by Sachiko Windbiel of Mimicafe Union in New York City. If you want to see more of Sachiko's work, you can follow her on Facebook and Instagram.
You can also watch Sachiko in action at the Innovative Sugarworks booth at That Takes the Cake in Austin. Video of her live demonstration is posted on our Facebook page here.

Nathalie's Champion Dark Chocolate Cake
Nathalie Sorensen of Lucy Cake Design and our own Kaysie Lackey recently paired up once again for an episode of Food Network's Cake Wars. This time they competed against other teams who had also previously won on Cake Wars. It was the Avengers episode of Cake Wars Champs!

Once again, Nathalie and Kaysie pulled off an epic win! Not only was their sculpted cake visually stunning and impeccably crafted, it was delicious as well! And here is the recipe for the cake within the creation!
Ingredients
Chocolate Cake:
- Unsalted butter, for greasing
- 125 grams (about 1 cup) awesome-quality unsweetened cocoa powder, plus more for dusting
- 90 grams dark chocolate, chopped
- 360 milliliters (about 1 1/2 cups) hot coffee
- 310 grams (about 2 1/2 cups) all-purpose flour
- 10 grams (2 teaspoons) baking soda
- 5 grams (1 teaspoon) baking powder
- 600 grams (about 3 cups) sugar
- 180 milliliters (about 3/4 cup) vegetable oil
- 6 grams (1 teaspoon) kosher salt
- 5 milliliters (1 teaspoon) vanilla extract
- 3 large eggs
- 360 milliliters (about 1 1/2 cups) buttermilk
Toffee:
- 2 cups (4 sticks) unsalted butter
- 2 cups sugar
- 1 teaspoon kosher salt
- 1/2 teaspoon vanilla extract
Italian Meringue Buttercream:
- 369 grams (about 1 3/4 cups) sugar
- 125 grams (about 1/2 cup) water
- 20 grams (about 1 tablespoon) light corn syrup
- Pinch kosher salt
- 170 grams egg whites
- Pinch cream of tartar
- 452 to 565 grams (4 to 5 sticks) unsalted butter, cubed, at cool room temperature
- 2 tablespoons vanilla bean paste
Chocolate Feuilletine Crunch:
- 4 ounces great-quality dark chocolate
- 4 ounces great-quality milk chocolate
- 2 to 4 ounces feuilletine flakes

For the cake:
Preheat the oven to 350 degrees Fahrenheit. Butter three 9-inch cake pans and dust with cocoa powder, shaking off the excess.
Mix the chocolate into the hot coffee in a medium bowl and stir to melt. Set aside to cool completely. In another bowl, sift together the flour, cocoa powder, baking soda and baking powder. Set aside.

Combine the sugar, oil, salt and vanilla in the bowl of a stand mixer fitted with the paddle attachment. Mix on medium speed, 3 to 5 minutes. (This batter is fluid and tends to get lumps; mix carefully with the paddle, or even use the whisk attachment on low speed to avoid lumps.) With the mixer on low speed, add the eggs, one at a time, mixing well after each addition. Scrape the bowl and continue mixing on medium-low speed until fully incorporated, 2 to 3 minutes. (Don't worry about overmixing at this stage; you need to make sure the batter base is fully mixed.)

Stir the buttermilk into the coffee mixture. In alternating batches, add the flour and buttermilk mixtures to the batter base. Mix until just combined, being careful not to overmix. The batter should be thick but fluid. Stir or mix by hand to get rid of any lumps; strain if you feel compelled.
Divide the batter among the prepared cake pans. Bake until a toothpick comes out clean or with just a few crumbs, 20 to 30 minutes. Let cool completely.
For the toffee:
Line a baking sheet with parchment paper.
Combine the butter, sugar and salt in a heavy-bottom saucepan fitted with a candy thermometer. Heat over medium-high heat to 300 degrees F (the hard crack stage), 7 to 10 minutes. Remove from the heat and stir in the vanilla extract. Pour over the prepared baking sheet and let cool completely. Break into small pieces, then process into a powder using a food processor or coffee grinder.

For the buttercream:
Combine 339 grams of the sugar, the water, corn syrup and salt in a heavy saucepan fitted with a candy thermometer. Heat over medium-low heat until the sugar dissolves. Increase the heat to medium, being careful not to let the flames go up the sides of the saucepan. The target temperature for the syrup is 250 degrees F.
Meanwhile, combine the egg whites and cream of tartar in the bowl of a stand mixer fitted with the whisk attachment. When the syrup has reached 230 degrees F, run the mixer on medium speed until the egg whites get frothy. Sprinkle the remaining 30 grams sugar into the egg whites and continue to whip on medium speed. (The egg whites should increases in size and form soft peaks by the time syrup reaches 250 degrees F.) Once the syrup reaches 250 degrees F, increase the mixer to high speed and carefully pour the hot syrup down the side of the bowl, being sure not to hit the whip. Whip the mixture until it has cooled to room temperature, 5 to 10 minutes.
Replace the whisk with the paddle attachment. Gradually beat in the butter, a few cubes at a time, on medium-low speed. Mix until the buttercream comes together, then mix in the vanilla bean paste.
Mix 3 to 4 ounces of the powdered toffee into 1 cup of the buttercream and set aside.
For the chocolate feuilletine crunch:
Line a baking sheet with parchment paper.
Melt the dark chocolate and milk chocolate in a double boiler. Remove from the heat and mix in the feuilletine. Spread on the prepared baking sheet and let cool. Crumble into bite-size pieces. Set aside.

To assemble the cake:
Set one cake layer on a serving plate. Spread with a thin, even layer (about 1/4 inch) of the buttercream, then spread with a thin, even layer (1/8 to 1/4 inch) of the toffee-buttercream mixture. Top with feuilletine crunch. Repeat with the remaining layers. Cover the cake with the remaining buttercream.

Kaysie's Chocolate Covered Strawberry Roses
You might have seen the video going around Facebook of Kaysie Lackey's gorgeous Chocolate Covered Strawberry Roses.
It was such a hit, we thought we'd give you all a little look at how Kaysie made them, just in time for Valentine's Day. Because we love you.

Ingredients:
- 12 large strawberries
- 24 ounces semi-sweet or dark chocolate chips
- 1 pound white modeling chocolate
- 2 egg whites
Supplies:
- Innovative Sugarworks' Sugar Shapers
- 12 wooden skewers, covered in green florists' tape
- 9 piece rose cutter set
- Pink petal dust
- Floral foam
The prep for this is real simple- put your semi-sweet or dark chocolate in a double boiler and drive one skewer into the top of each strawberry. The skewers will be the stems of your roses. Use a block of floral foam to hold your roses upright. This becomes important once you dip them in the melted chocolate.

Stir the chocolate constantly while it's melting until you get a silky smooth consistency with no remaining lumps.

One at a time, hold each strawberry by its skewer and dip it in the chocolate.

After dipping, return the skewered strawberries to the floral foam and allow to cool completely.

While your strawberries are cooling, roll out the white modeling chocolate to about 1/8" thick (If you're using a pasta machine, set it to 6). You're going to use the 4 cutters from your rose cutter set that best fit the size of your strawberries. These will be your petals.
Find the one size that best fits your strawberry- this will be your second layer. Go one size larger for your first layer and third layers, another size up for your 4th layer, and two sizes up from that for your 5th layer.

The number of petals you need corresponds to the layer you're on. For example, you'll need 1 petal for your first layer, 2 petals for your 2nd layer, and so on. If you don't feel like mathing, you can always cut them as you go along. :)

Once the chocolate on your strawberries is completely cool, you can start wrapping the petals around the strawberry. Start by smoothing some modeling chocolate around the strawberry so that no dark chocolate will be visible between the rose petals.
Remember to warm each piece of modeling chocolate you use in your hands before wrapping it so it doesn't crack or break.

Your first petal will be oriented sideways (with the point to one side and a long rounded side facing up. Tool the top edge with your pointed tip Sugar Shaper to give it some shape. Then, wet your strawberry with egg white, line up the point of the petal with the side of your strawberry's cone and start wrapping. Keep the top of the petal tight for a closed spiral.

For all the remaining petals, the point will face downward. Use your Sugar Shaper to tool the top (wide end) of each petal.
For your next layer, paint a stripe of egg white on one long side of one petal and tuck that side under the preceding layer. Place the 2nd petal opposite the first and wrap in the same direction as your first layer, keeping the petals still fairly tight. Tack the petals in place with egg white.
Use your Sugar Shaper to open up the petals a little if you wish, and use the side of the shaper to curl back the edges slightly.
Repeat for your third layer, arranging the petals equally in thirds around the strawberry.

For your 4th layer, use the back of a soup spoon to give the petal a rounded shape, curling back the top edge as desired. Let these petals set for 10 minutes so they'll hold their shape. Paint egg white on one side of each petal and attach to your rose at equal distances. Do not tack down the other side of these petals with egg white.
Let dry until the petals are firm and the eg white is set. Do mostly the same thing with your last layer, but curl the petals back even more- curl both sides, but curl one at least twice as much as the other.
Don't worry if all your petals aren't exactly uniform. Roses are organic objects and their individual uniqueness will add to the realism.

Lastly, brush some pink petal dust along the edges of the petals. Don't go overboard with the dust- you want a soft blush of color.

That's the end! You now have a dozen long-stemmed Chocolate Covered Strawberry Roses for the one you love. (Or maybe just for yourself!)


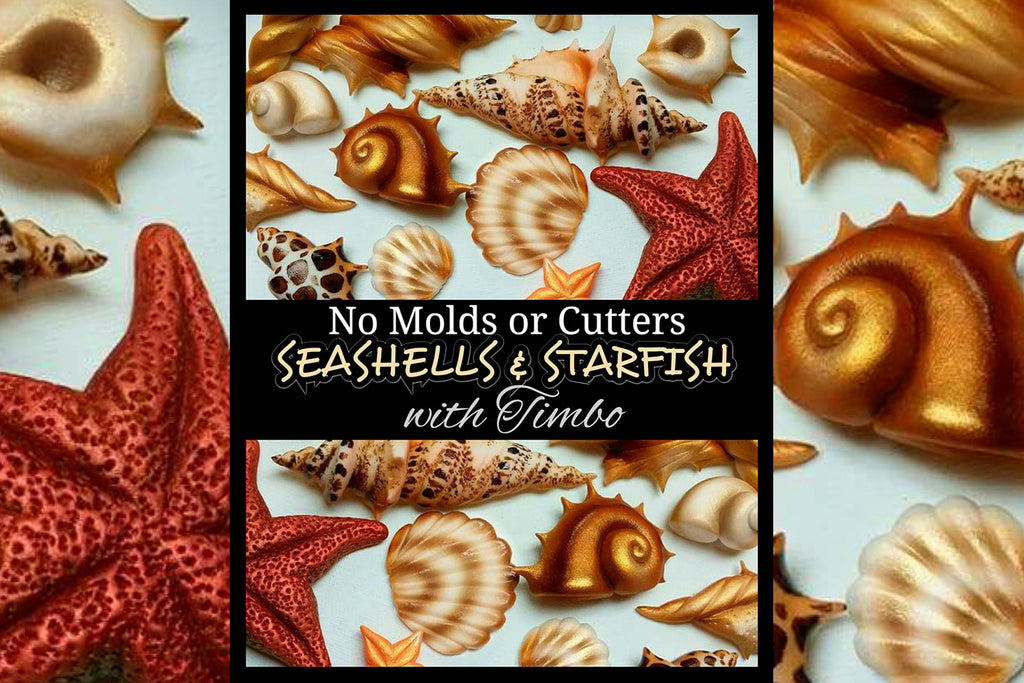
Seashells and Starfish with Timbo!

Timbo is recognized for his complex sculpting, intricate detail work, and a hyper-realistic special-effects style. Today he's demonstrating how to make these incredibly convincing seashells and starfish completely by hand- no molds needed!

Everyone is either always asking me how I make my seashells, or not asking me because they're assuming I just use molds....I don't! I'm going to show you all the quick and easy way I make some of my seashells and starfish.


Hope you all find this useful, and if you do, SEND ME PICS!!!!!
We hope you're as excited as we are about Timbo's Starfish and Seashells! If you want to see more of Timbo's work and hear about his upcoming classes, follow him on Facebook and Instagram.