Sugarworks Blog
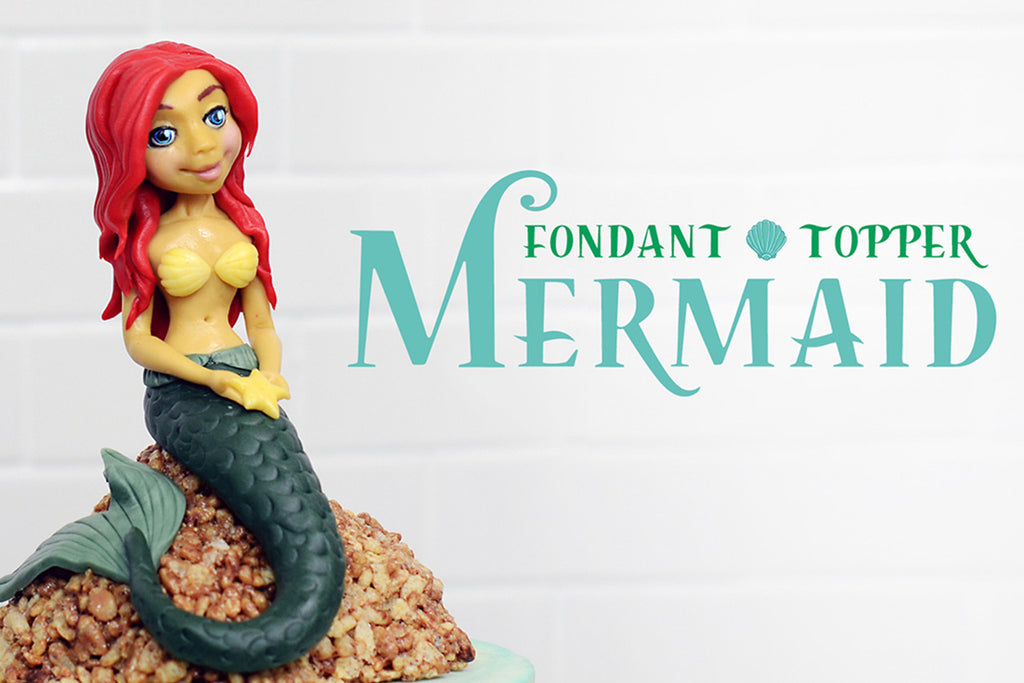
Liz Marek’s Mermaid 2.0

Liz Marek is the owner of Artisan Cake Company in Portland Oregon and runs the online cake decorating school Sugar Geek Show. She specializes in sculpted and special effects cakes, and enjoys making tutorials, teaching classes around the world and coming up with new and innovative cake techniques.

Liz is the author of the highly acclaimed cake decorating book, Artisan Cake Company’s Visual Guide to Cake Decorating. Her work has been featured in many magazines such as BRIDES, Oregon Bride, Portland Bride and Groom, Cake Masters, American Cake Decorating Magazine and more. She has competed and won on Food Network's Duff till Dawn (2015) and her work has been televised on Food Network's Outrageous Cakes series and news stations.
Liz is also an early adopter of Sugar Shapers as her professional go-to tool for sculpting and modeling. Today she delivers an update on one of her first highly popular tutorials. The original mermaid cake topper tutorial was made before Sugar Shapers were developed. This new one reflects her current sculpting habits, as well as her growth as an artist. We adore this mermaid and we know you will, too! Check it out!

One of the very first videos I ever made for my YouTube channel was a fondant mermaid topper tutorial. It quickly became very popular and was one of the reasons I began making more videos for youtube.

That was four years ago! I have learned a lot about making figures and the tools that I WISH I had when I first started sculpting. Yep, I'm talking about those amazing Sugar Shapers!

It would have been a lot easier to get those face shapes and little details with Sugar Shapers and I'm not just saying that! I use mine so much, I even found one in my purse the other day! My favorite sugar shaper is definitely the pointed shaper!

I use it for everything from shaping lips, eyes and making my signature smiles.
I love the rounded wedge for making perfect scales or fingernails. The knife is great for making wood grain texture or soft lines without tearing the fondant. The ball tool is invaluable for all kinds of textures but I especially love it for making eyes on my toppers faces.

I have put together an updated (timelapse) version of my popular mermaid topper tutorial her for your enjoyment! And you can learn more about sculpting figures and making awesome cakes on my online tutorial school Sugar Geek Show.
This time-lapse video should give you a good idea of how to use Innovative Sugarworks Sugar Shapers to sculpt your own mermaid, or another figure using similar techniques. To see the full step-by-step video, click this link to Sugar Geek Show!
We hope you've enjoyed this mermaid topper instructional by Liz Marek! If you want to see more of Liz's work, visit Artisan Cake Company and follow her on Facebook. And if you're interested in learning more and crazier cake decorating techniques, go to Sugar Geek Show and check out its extensive library of tutorials. With skill levels ranging from beginner to advanced, Sugar Geek Show has something for everyone!
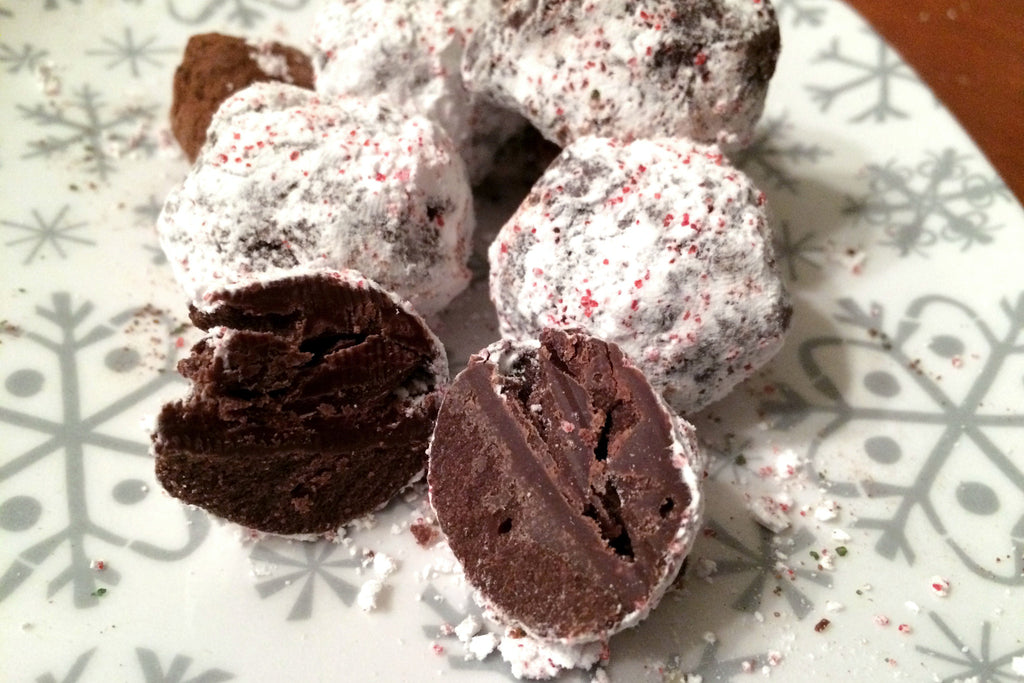
Boozy New Year’s Truffles
It's just about time to ring in the new year! And in these last moments before we all make our resolutions to forsake sugar, fat, chocolate, and alcohol, we thought we'd indulge in all of those things with these delicious boozy chocolate truffles! This year's flavor selections are Chocolate Peppermint Schnapps Truffles and Mocha Amaretto Truffles.

Ingredients
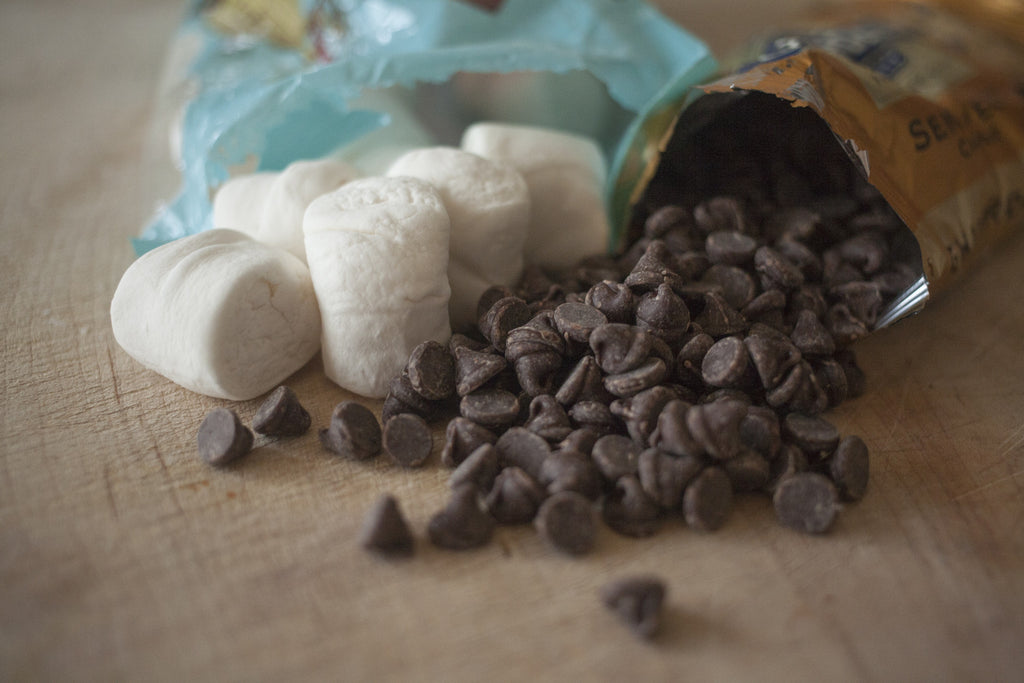
- 2 10-oz bags of semi-sweet chocolate chips (I like Simple Truth chocolate, but use whatever brand you like. Just note that most other brands sell their chips in 12-oz bags, not 10-oz. So scale up accordingly)
- 6 Tablespoons unrefined coconut oil
- 1/2 teaspoon salt
- 1/4 cup liquor of your choosing
- 2 Tablespoons instant coffee
- Powdered sugar and/or cocoa powder for rolling

These truffles are insanely easy. The first thing you're going to do is melt the chocolate in a double boiler. If you don't have a double boiler, don't worry; just stack up two pots, boil water in the bottom one and put the chocolate in the top one. Easiest kitchen hack ever. And it will prevent your chocolate from burning as easily as it would in a single pot alone.

Once the chocolate is melted, add the coconut oil and stir until it's completely melted and everything is smooth.

I wanted to make two different flavors, so at this point I divided the mixture by pouring into two separate bowls. Into one, I added 1/8 cup Peppermint Schnapps and into the other I added the instant coffee and 1/8 cup Amaretto. Stir well. You can play with how alcoholic you want your truffles and add more or less to taste. These were not super boozy.

Now, just pop the bowls in the fridge and chill until firm. I left them in overnight, but a few hours is probably sufficient.
Once the mixture is firm, scoop out enough chocolate to make 1 1/2" balls, shape them into spheres, and roll into a coating. I used powdered sugar and red decorating sugar for the Peppermint Schnapps truffles and cocoa powder for the Mocha Amaretto truffles. The coating not only makes the truffles look nice, but allows you to pick them up without getting your fingers quite so messy.

Your New Year's dessert is now ready! If you're not serving them right away, keep them in the fridge until it's time to celebrate. Happy New Year!


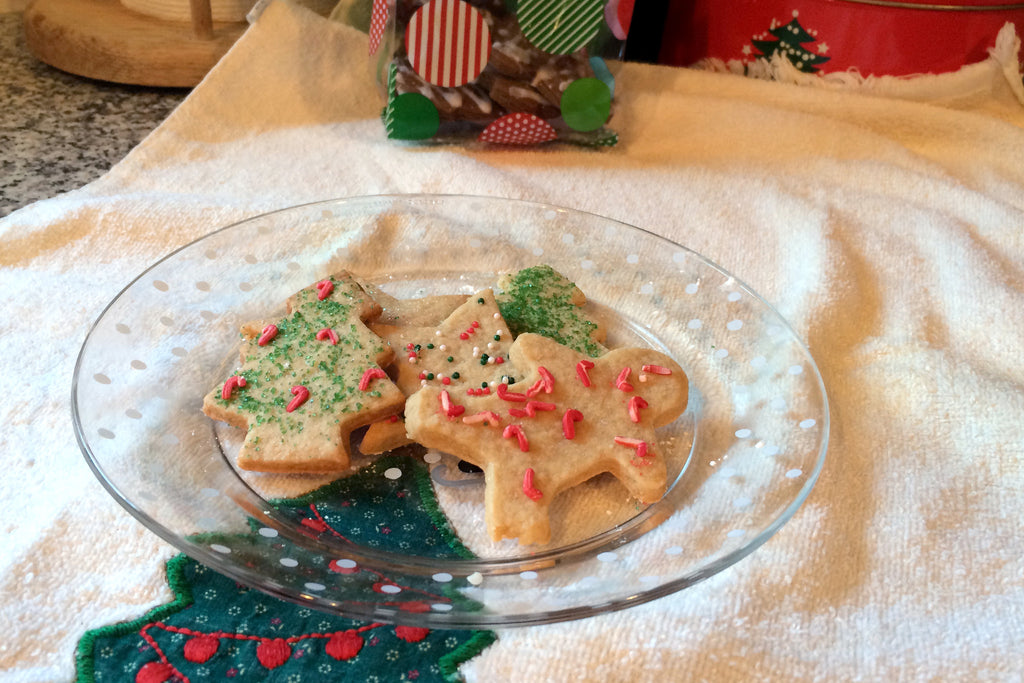
Bourbon Sugar Cookies
We don't have a lot of traditions in our family, but the one constant thread of our holiday celebrations is cookies. For as long as I can remember, we've made cookies together at Christmas- drop cookies, rolled cookies, dipped cookies, jammy cookies. Everywhere we go around the holidays, people know to expect a basket of assorted cookies. At some point, friends even started requesting their favorites.

This year, I'm going to share with you a few selections from our family cookie extravaganza. We'll start with my signature Bourbon Sugar Cookies. These are a take on the traditional Christmas sugar cookie archetype, but with a few notable aberrations. Most obviously- booze. I like the slight edge the bourbon gives these cookies, but don't worry- the alcohol content is minor. No one's going to get tipsy off your cookies.

Ingredients
- 1 cup packed brown sugar
- 3/4 cup Earth Balance spread
- 2 tablespoons vanilla almond milk
- 1 teaspoon pure vanilla extract
- 1/4 cup bourbon
- 1 teaspoon salt
- 1 teaspoon baking powder
- 2 1/2 cup flour

Stage One
In a mixing bowl, combine the sugar and Earth Balance until well blended. Add the almond milk, vanilla, and bourbon and stir together. Then mix in the dry ingredients and stir into a firm dough. Wrap in plastic and refrigerate at least 3 hours.

Stage Two
On a floured work surface, roll your dough out about 1/8' - 1/4" thick and cut into whatever shapes you choose.

I usually decorate my cookies at this stage using colored sugar, sprinkles, or crushed candy. If you plan on decorating them later with frosting or icing, leave them plain now.

Bake at 350 degrees for about 8 - 10 minutes. The time on these can vary a lot based on the thickness of your cookies, so check them frequently. They can go from slightly underdone to burned real quick.
These might be my favorite Christmas cookie. They're classic, yet with a twist. They look great on a holiday cookie platter, and this recipe makes about 3 dozen so you've got plenty to share!


Perfect Roasted Chestnuts Every Time
Roasted chestnuts are an iconic element of the winter holiday season. We all sing about them, (in fact, nearly everyone from Garth Brooks to Twisted Sister has sung about them) but here in the United States, very few of us ever eat them. And fewer still have made them ourselves.

Of those I've met who have tried to roast chestnuts at home, most expressed frustration and disappointment- the chestnuts came out dry, or hard, they burned before they even softened, the whole batch was internally mildewed. They can be tricky, especially if you're unfamiliar with the nuts in their raw state.

So today, I thought I'd show you how to get a full batch of perfect chestnuts every time you roast.
Be Picky!
The first thing we need to do is select our chestnuts, and this is really important. The nutmeat of chestnuts is softer and moister than most other nuts. This makes them really susceptible to mold and mildew. So you need to be very careful when you're picking your batch. Don't just blindly scoop a bunch out of the bin; be that obnoxious shopper that picks nuts out of the bin one at a time and scrutinizes each one. Your kids will be embarrassed, but trust me- the payoff is worth it.

And here's what you need to look for. First, check the bottom of the shell. If you see any trace of green mold, toss that one back. It's not just exterior- that nut is definitely moldy.
Next, look at the tip. If the pointy part of the nut is starting to look pale and fuzzy, don't take that nut. This is a sign that mildew might be growing inside. Now, this sounds really obvious. "Why would I buy fuzzy food? Fuzzy always means bad!" But this doesn't look like mold fuzz. If you're not very familiar with chestnuts, this slightly fuzzy pale tip looks like a normal feature of the nut. Even many grocers don't realize it's a sign the nuts are bad internally, so you'll find many fuzz-tipped nuts in the bin. If it's only slight, the nutmeat might still be okay, but it's not worth the risk. Hold out for some really good ones.
A healthy and delicious chestnut will be firm and shiny with no sign of fuzz. In the below photo, the chestnut in the foreground is a good one; the one in the background is questionable.
Toil, but not much trouble
Okay, so now we've got our good-looking raw chestnuts. There's a little prep work involved before we start cooking. You need to cut open the shells or your chestnuts will explode during the roasting. (This sounds exciting, but really is just disappointing and a little messy.) I just use a paring knife for this. It's a little tough to cut through the shells, so I find the smaller the blade the less chance of accidents if the nut slips while I'm cutting. (And they're very smooth and hard, so watch out for slipping.)

Make sure you cut all the way through the shell and that you're not just scoring the surface. Most people cut an X shape into the shells. Not only does this make it easier to peel the shell away after they're roasted, but they look so pretty with the four corners peeling back to reveal the delicious roasted nutmeat inside.

Next is the crucial step that most people don't seem to know about. You've got to boil them before you roast them. Boil the nuts, shells and all for 15 minutes.

Then drain the water and lay the nuts out on a baking sheet, cut-side up. Now just bake at 425 fahrenheit for 12 - 15 minutes.

They're best eaten warm, but give them a few minutes to cool before you try to peel the shells off or you might burn your fingers.
Now, put on a little Nat King Cole and let Jack Frost nip at your nose!

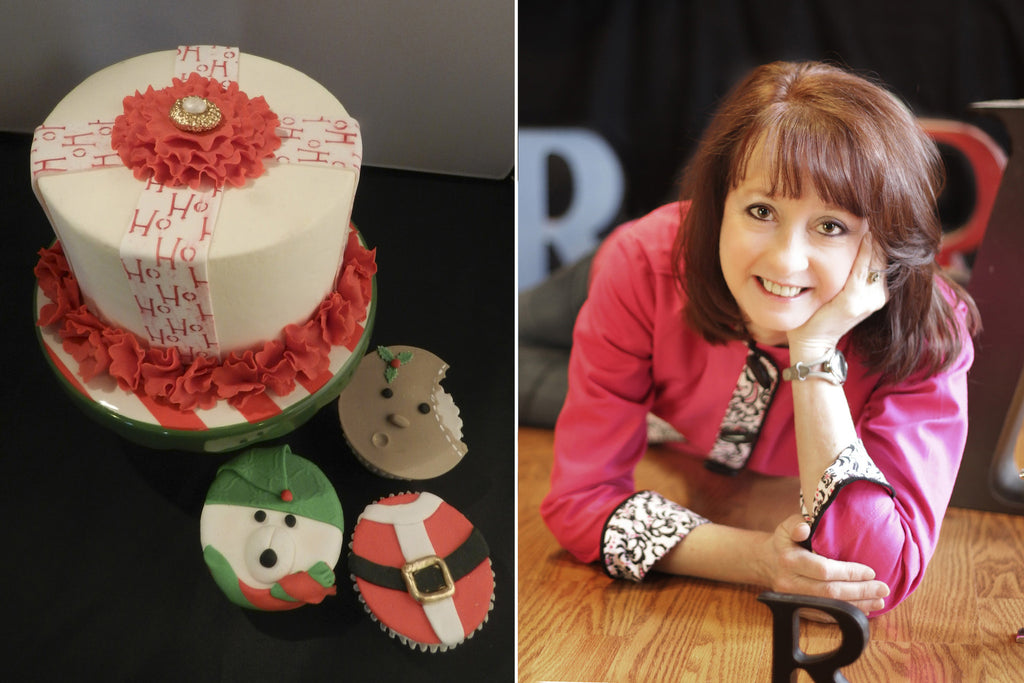
Ruth Rickey’s Holiday Ruffle Cake

Ruth Rickey is a former lawyer, administrative law judge and bakery owner. Ruth was named the top Bakery Manager in the world for the IGA stores (3200 stores in 31 countries) in 1999, then opened Ruth’s Sweete Justice Bakery in 2000. Ruth closed the bakery at the end of 2011, so that she could focus strictly on teaching and judging. Ruth began a custom product line of cutters, veiners and dusting powders under the name Sugar Gypsy and has started an educational blog called SugarZen.
Ruth has been seen on all 3 networks that have cake programming. She won WE tv’s Wedding Cake Wars, she assisted Pat Jacoby’s team twice in their victories on TLC’s Ultimate Cake Off and she has been featured in 3 different Food Network specials about the Oklahoma State Sugar Art Show. Her cakes have graced the pages of national and international publications for years.
Ruth was given The Sweet Life Hall of Fame award at the National Capital Area Cake Show in Virginia and the Cake Support Award at the Cake Masters Awards in Birmingham, UK. She is also one of only a few dozen ICES Certified Master Sugar Artists in the world!
Ruth has taught all across the US and is now teaching and demonstrating internationally.

Today, Ruth is going to teach us how to make this stunning holiday cake using stenciling, ruffling, and hand painting techniques.

Start with a cake in your chosen size already covered in fondant. You can use Sugar Smoothers to smooth the fondant and get crisp edges.
Put a thin layer of shortening on a non stick mat and roll out your fondant or gumpaste on the shortening coated mat. I used Sugar Gypsy's Silicone Baking Mat.

Trim the fondant and turn the paste sticky side up. Then, place your stencil on the sticky paste. I used the Ho Ho Ho stencil from 2T Stencils.

Using a soft brush, dust the stencil with petal or luster dust. Luster dust grabs better and is less likely to smear. I used red petal dust.

Remove the stencil and trim the fondant into strips. Attach the strips to the cake, like ribbons on a gift box.
Next, cut out scalloped circles in red gumpaste. I used Choco Pan red gumpaste and a standard plastic circle/scalloped circle cutter set.

Using the pointed Sugar Shaper, ruffle the edges of the scalloped circle. I used the light blue sugar shaper, regular size, in soft. To ruffle, use your dominant hand to turn the shaper quickly back and forth, while using pressure from a finger on your non dominant hand to maintain consistent pressure.

Repeat with three smaller scallops. Attach each scallop, larger to smaller, in the center where the ribbons meet. Use a brooch mold to make a decorative sugar brooch to place in the center of the cake. I used Brooch 4 from my Brooch collection at Sugargypsy.com. Paint the brooch as desired. I used non-toxic gold metallic luster mixed with lemon extract on the facets of the brooch and used Super Pearl luster dust mixed with lemon extract for the stone.

For the border, cut out small scalloped circles in red gumpaste and ruffle as before. Scrunch the circles and place at the base of your cake.

Now stand back and admire your creation! This cake is an elegant and festive addition to any holiday event!

We hope you enjoyed this instructional by Ruth Rickey! You can follow Ruth on Facebook, subscribe to her Sugar Zen blog, or visit her online at RuthRickey.com and SugarGypsy.com.
Jen’s Decadent Dairy-Free Chocolate Peppermint Fudge Recipe!
Something about the holidays just makes me yearn for rich, decadent treats. And nothing says "Winter Holidays" to me more than peppermint and chocolate together. As a kid, rich chocolate peppermint fudge was one of my favorite treats ever. As an adult, however, the high dairy content of traditional fudge recipes is a no-go for my lately-acquired sensitive stomach.
This year, though, I was determine to have my fudge (and eat it, too!) So, I started with a fudge recipe I found on the back of a jar of Marshmallow Fluff (no, seriously) and totally hacked it to make it completely dairy, egg, and gelatin free.
And it's freaking delicious.

This recipe hinges on a new product Trader Joes has come out with. They're a type of marshmallow that contain no dairy, egg, or gelatin, relying instead on carrageenan for their consistency. Carrageenan is an extract from certain seaweeds, which sounds a bit odd (mmm, seaweedmallows...) but trust me- these marshmallows are fantastic.
So this is what you need:
Ingredients
- 1 bag Trader Joes Marshmallows
- 2 1/2 cups brown sugar
- 6 tablespoons Earth Balance spread
- 2/3 cup plain non-dairy milk (i used soy this time, but almond works just as well)
- 3/4 teaspoon salt
- 1 teaspoon vanilla extract
- 16 oz semi-sweet chocolate chips
- 1/4 cup peppermint Schnapps (or 1 tablespoon peppermint extract if you're not into alcohol)

This recipe is super simple. The first thing you're going to do is combine the marshmallows, sugar, Earth Balance, soy milk, and salt in a large soup pot. Keep the heat low until the marshmallows are completely melted and you've got all the ingredients well-combined.

Then, raise the heat to medium and bring it to a boil. Once you get it boiling, keep it going for 5 minutes. I've made this a few times now, and the 5 minute rule is really spot on. I've never had any success in candy-making with the "soft ball method", so I need definite times. There's just one catch- the mixture will release some air bubbles as it heats, so make sure it's legitimately at a boil when you start the timer. If you under-boil it, it won't set quite right.
After it's boiled for 5 minutes, remove the pot from the heat and stir in the vanilla, chocolate, and peppermint. I used Peppermint Schnapps for a little boozy kick to my fudge.

If you go that route too, add it after you pour in the chocolate chips. If you add the alcohol to the boiling hot candy it'll just fizzle away. Keep stirring until the chocolate has completely melted and the candy is silky smooth.

Pour it into a greased 9x9" pan. I sprinkled some red and white sugar on top just to drive home that peppermint theme, but this is totally optional.

That's all there is to it! Just let it cool and enjoy! This is my new favorite holiday treat- rich, smooth, and so satisfying. I just might make this a treat for every holiday!


Sugar Structures with Kaysie Lackey
Kaysie Lackey is world-renowned for her incredible, gravity-defying 3D sculpted cakes. But how does she do it? By all laws of physics and everything you've ever learned about flour, sugar, and moisture, that cake should fall down, fall apart, sink, or sag.
 But just like your own body couldn't stand up without a skeleton, those cakes have an internal structure that holds them up and keeps their form. Today Kaysie is going to teach us all about the new Sugar Structures cake armatures!

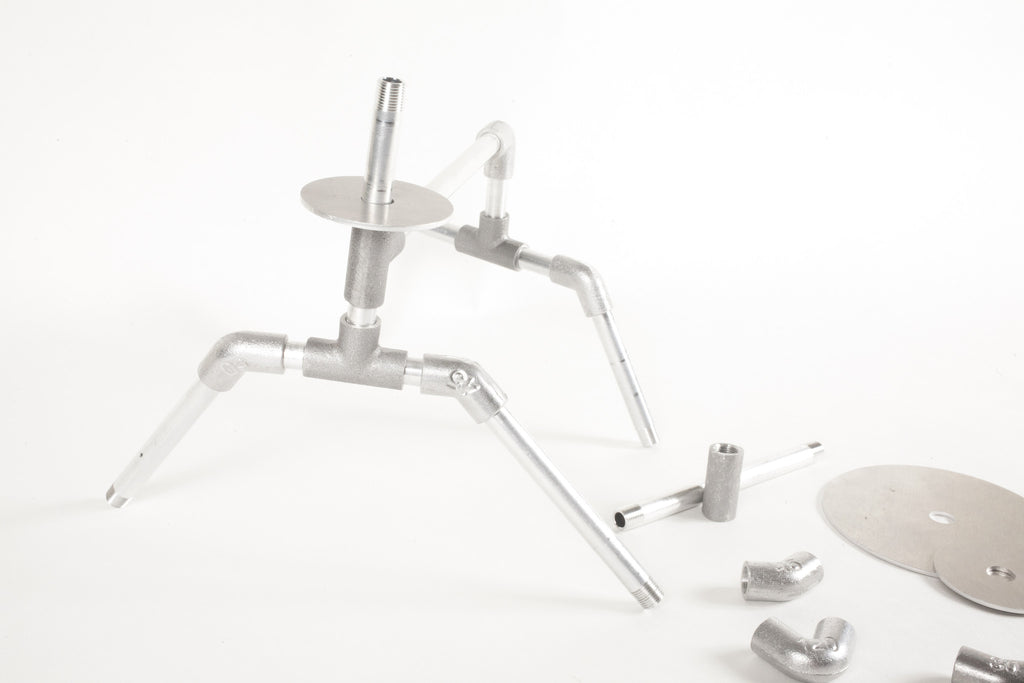
Cake Artists have known forever that you need a structure to hold up your sculpted cakes, but until now we had to rely mostly on hardware store findings: pipes, fittings, wires. These things were designed and manufactured for plumbing, not for food. They were heavy, clumsy, and had to be wrapped in plastic for health and cleanliness.
But not anymore!

Sugar Structures are made of lightweight food grade aluminum. Pop them in the dishwasher and they're clean and ready to be eaten from. For this guy, I used the 2-Legged Running kit and started by building my basic skeleton. The pipe elbows are engraved with the degree of their angle, making it super easy to build a figure in motion whose arms and legs each bend at different degree.

Next I added some foam cake boards to hold the weight of the body. This is going to be one chubby teddy! In addition to weight support, the foam boards also allow for gradual sloping of the parts I want to be rounded. You can see in the photo how I've carved out some of the foam on the bottom-most board so it sits around the metal joining. This will give my bear a more gently rounded bottom.
The blue straw on top is a bubble tea straw. These fit perfectly around the Sugar Structure rods and allow you to slide the head on and off smoothly without making multiple holes in your cake.

Next I start to add the cake. This guy is going to be about 2 feet tall, so that's a lot of cake weight I've added already, and more will come when I put on his head. The Sugar Structures are super sturdy and won't bend, warp, twist, or break. I can make this cake enormous!

And there he is! Sugar Structures are the strongest, safest, simplest way to make a sculpted cake that will stand tall and proud through even the longest party!
We hope this gives you a good overview of our upcoming Sugar Structures cake armatures. We expect these to be hitting the shelves in the next month or two. Sign up to our email list to see the release announcement as soon as it's given!
Don't compost those carvings- make cookies!
Halloween is just around the corner, and in our house that means one thing: it's Jack-O-Lantern time!

Now personally, I'm a bit of a food waste nut. I am the queen of "I can do something with that!" Your mustard greens have gone to seed? I'll make mustard. Carrots for dinner? Don't toss those greens; I'll make pesto! Kabocha squash rind chips? Ok, this is where I usually lose people, but really- they're good.
So pumpkin carving kind of kills me just a little bit. All that potential food used as home decor! But at least I can salvage the cast offs- roast the seeds and use the carved out hunks to make pumpkin goodies.
After this week's pumpkin carving night, I cranked out some delicious, Halloweeny chocolate chip pumpkin cookies.

Ingredients
- 2 cups pumpkin puree
- 1.5 cups sugar
- 1/4 cup vanilla almond milk (or whatever type of milk you prefer)
- 1/4 cup molasses
- 1 tsp vanilla extract
- 2 tsp cinnamon
- 1 tsp ground cloves
- 1 tsp ground ginger
- 1/2 tsp salt
- 1/2 tsp baking soda
- 2.5 cups flour
- A whole lotta chocolate chips (I prefer semi-sweet)

Pumpkin Prep
The first thing you'll need to do it prepare your pumpkin. Gather all the big chunks you cut out of your Jack-O-Lantern and pile them in a pan. Use a pan with a lid to prevent the chunks from drying out in the oven. Bake at 425f until the pieces are very soft. This will vary a bit depending on what sort of face you gave your Jack-O-Lantern and if it resulted in big chunks of pumpkin or small ones. But expect somewhere between 25 and 45 minutes.

Once it's cooked squishy, scrape the pumpkin meat off the skin and into a food processor. Puree it until it's smooth.

Cookie Creation
Combine the pumpkin puree, sugar, molasses, almond milk, and vanilla extract until well mixed. Stir in the cinnamon, gloves, and ginger.

Add the flour, salt, and baking soda and stir until smooth. Because of the pumpkin base, this dough will be softer than other cookie doughs. Fold in as many chocolate chips as you like.

Drop by spoonful onto cookie sheets and bake at 375f for 8-10 minutes. These are soft and chewy cookies so they'll look puffy and feel slightly firm when they're done.

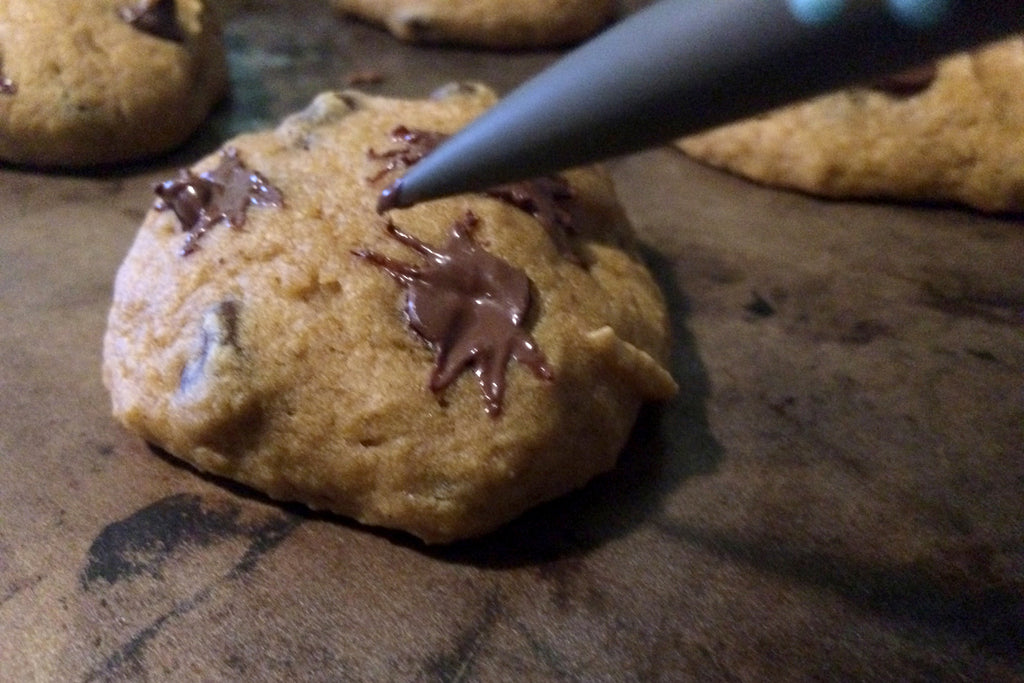
For an extra Halloween touch, while the cookies are still warm, use your pointed tip Sugar Shaper to draw out the warm chocolate of any exposed chocolate chips to make them into little chocolate spiders.

That's it! You've saved some good, edible food from the compost bin and made some delicious cookies in the process! Trick or Treat!

DIY Stencils in a Pinch
The problem with being known in your social circle as the one who does "fancy cakes and sweet things" is that it becomes expected that you'll show up to any gathering or event with something adorable and quirky. Gone are the days when you can show up to a party with a bag of chips and a jar of salsa.
Unfortunately, friends and family don't always understand the time involved in your work. Compromises must be made.

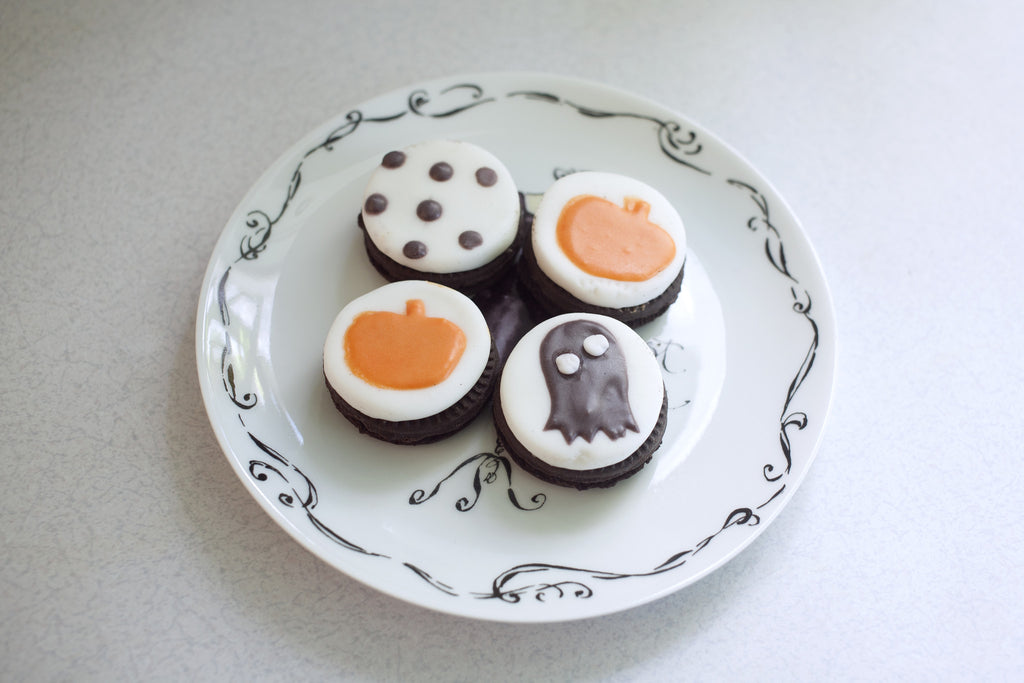
These stencil-topped Oreos are a quick and simple way to bridge the gap between "I stopped on the way here and bought a bag of chips" and "I spent 14 hours making cake-pops for your party."
Crafting Your Stencils
You don't even need to stop by the supply store for stencils- we're going to make our own. All you'll need is some card stock, an Exacto knife, and, if you've got any, hole punches (shaped or circular, let your tools guide your vision on this one). And of course you'll need your Sugar Smoothers and Stencil Genie™ for the stenciling.
Trace the size of an Oreo onto your card stock, but don't cut this part out when you make your stencil- it's just a guide. Inside the circle, draw whatever shape you want to be on your cookie. Don't go too close to the edges of the circle; these will be the edges of the cookie when you stencil and it'll get a bit messy if it bleeds over the edge. Then just cut out with your Exacto knife. You can also use your punch to punch a shape, or shapes inside the cookie circle.
That's all there is to it. You've just made a stencil. Now do a couple more so you have some variety.
Crafting Your Cookies
Now all you need to do is stencil on the icing. Oreos have a texture that makes stenciling directly onto the cookies sloppy, so I cut out circles of white fondant and topped the cookies with them. I also dyed my icing orange and purple for Halloween. You can use any icing you like for this; you can even just buy a can of frosting at the store. (Remember- these are party snacks and you're not being paid. ;)
Load your stencil into your Stencil Genie™. It doesn't need to be the exact size of the Genie; the magnets will hold it in place just fine. And center your cookie beneath your stencil.
Spoon some icing over your stencil and use your Sugar Smoother to scrape off the excess.
The small sized Sugar Smoothers fit perfectly inside the Stencil Genie™.
Repeat until all your cookies are stenciled and you're done!
Quick, easy, and cute enough for a casual Halloween party with your pals!


W.E. Sugarart Melts your Halloween Heart!

Nayda Hernandez is the self-taught talent known throughout the cake world as W.E. Sugarart. After leaving a successful career in the medical field to spend more time with her children, Nayda stumbled into the world of cake art while attending a birthday party. The party's beautiful fondant cupcake toppers inspired her to seek out online classes and tutorials and try her own hand at the craft.

Nayda's work is is often described as whimsical and playful. She specializes in sculpted child figures, often incorporating costumes and props reminiscent of childhood folly. Nayda frequently shares her work on her Facebook page and her Instagram.
Just in time for Halloween, Nayda is joining us at Innovative Sugarworks to teach you how to make this adorable fondant Scarecrow and its Jack-O-Lantern companion!

Supplies/Tools Needed:
- Gumpaste/fondant in pastel colors: 3 shades of tan (very light, light, & medium), light blue, pale yellow, salmon, watermelon, white
- Gel paste colors: baby blue, white, tangerine, ivory, khaki
- Watermelon petal dust
- Soft Mini Tip Sugar Shapers
- Cutters: 4” & 2.25’ circle cutters, mini heart cutter, mini diamond cutter, mini square cutter
- detailing paint brushes
- dotting tool
- wood skewer
- 1.4” floral foam ball
- Shortening
Part 1: The Scarecrow

Step 1:
Start with 130g of light blue gumpaste/fondant and roll into a sausage shape with tapered ends. Fold your sausage in half to form an inverted ‘V’. This will be your scarecrow's pants. Cut off the ends so you have 3” from the top to the end of each leg. Then use the smaller end of the bone chisel sugar shaper (orange) to create creases or folds in the legs. Set aside to firm up before adding the torso.

Step 2:
Take 84g of your gumpaste/fondant in the lightest shade of tan (ivory) and roll/shape into a teardrop shape. Flatten the bottom so you can place it on the pants after it has dried. Set this aside.

Step 3:
Roll out a 2” x 4” piece of light blue gumpaste/fondant and cut off the corners as shown in the photo (this will be the upper part of the overalls). Place the torso on the light blue altered rectangle (make sure to flip over your light blue piece so the nice side is the side that will be showing). The torso should be slightly closer to the back so that when you fold them up the front portion will be higher than the back. Once you are happy with the placement, moisten the torso & attach the front/back of the overalls.

Step 4:
Cut out a small rectangle of the light blue gumpaste/fondant that you will use to make a pocket for the front of the overalls, moisten the piece then attach to the front of the torso. Use the smaller end of the square tip chisel (yellow) to make some stitches around the edges of the overall along the front & pocket as shown in the photo. Use the chisel to pull out the pocket so it will look like it is slightly open.

Step 5:
Take the wooden skewer and rub some shortening on it so you can insert it easily through the center of the torso/legs, then cut the skewer so you have about 1.5” above the torso to place the head once it is ready. Once you are happy with the placement of the body, remove the skewer and set aside both pieces to dry overnight.

Step 6:
Grab the 1.4” floral foam ball & 72g of the light tan gumpaste/fondant. Flatten the ball of gumpaste/fondant and rub some shortening on the side that will be against the ball. Wrap the gumpaste/fondant around the ball and roll until you get all the cracks out and end up with a smooth ball.

Step 7:
Press gently with your thumbs at the eye level in order to obtain cheeks. Using your little finger, gently press to form the jaw/chin and neck of the face. You can cut off any excess gumpaste/fondant but make sure to leave just enough for the neck.

Step 8:
Using the smaller end of the round tip chisel (green) make two holes where the eyes will be. Place a small ball of white fondant in each eye socket.
 Step 9:
Using the large end of the bone chisel make a hole where the mouth will be. Roll a small piece of the watermelon colored gumpaste/fondant to place around the mouth to form the lips as shown in the photo.

Step 10:
Cut out two small circles of the light blue gumpaste/fondant and place on the eyes, then color the edges with the blue gel paste (you can thin it out with a bit of water or Everclear). Apply some of the watermelon color petal dust to the cheeks. Take a piece of the darkest shade of tan gumpaste/fondant and form a small triangle/pyramid shape for the nose, moisten and place it on the face. Then mix a bit of white/ivory gel colors to achieve a cream color. Take your dotting tool and make three dots along each side of the mouth. Then with the fine detailing brush make two “X” as shown in the photo.
I like to take a skewer to make the hole in the head at this stage, so that once it is dry I don’t have to worry about damaging the face when placing it on the body.

Step 11:
Roll out four cone shapes (2 small & 2 large) to form the top and bottom eyelashes for your scarecrow. Moisten the top and bottom of each eye at the lash line, place the lashes as shown in the photo, and cut off the excess.
Step 12:
At this point, your pants and torso should have had time to dry over night. Assemble your scarecrow by re-inserting the wood skewer in the hole and stacking pants, torso, and head.

Now, take the ivory gumpaste/fondant, roll it out, and cut a thin strip that will be used to form the collar of the shirt. Moisten, then place the strip around the neck. Using the smaller end of the bone chisel, make some creases/folds in the collar.

Step 13:
Cut out a mini heart in the watermelon colored gumpaste/fondant, moisten and attach to the front pocket of the overalls. Use the pointed chisel (light blue) to make holes along the edge of the heart.

Step 14:
Roll two cone shapes (19g each) in the ivory gumpaste/fondant for the arms. Use the pressure of your little finger to give the arms a bend at the elbows. Pinch the end of each sleeve so they flare out slightly. Moisten the inside part of the arms and attach to the torso so the forearms are slightly resting on the thighs.

Step 15:
Cut out several pieces of gumpaste/fondant in several colors and shapes, they will be used as patches on the overalls and hat of your scarecrow.

Step 16:
Roll out and cut two 3” strips of the light blue gumpaste/fondant for the suspenders and roll out some of the pale yellow gumpaste/fondant to cut in very thin pieces of various lengths for the straw. Attach the suspenders to your figure's overalls and moisten the the ends of the sleeves and pants to attach some pieces of the pale yellow “straw”.

Step 17:
Roll two small balls of the light tan gumpaste/fondant for the hands. Flatten one end of each ball and cut a small triangle so you have two pieces that look like mittens. Clean/smooth out the edges and then moisten and attach the hands to the end of each sleeve.

Step 18:
Cut a round piece of the pale yellow gumpaste/fondant, moisten and attach to the back of the head. Then moisten and attach more of the yellow straw all around the head for the scarecrow's hair.

Step 19:
Roll out the medium tan fondant and cut a 4” circle for the brim of the hat and use the tri tip chisel to give it some texture. Moisten the top of the head and attach the hat to the top of the scarecrow's head.

Step 20:
Roll two teardrop shapes of the medium tan gumpaste/fondant and flatten the smaller end to make the shoes, moisten and attach to scarecrow.

Step 21:
Roll a thick piece of medium tan fondant and cut a circle using your 2.25” round cutter for the top of the hat. Roll and cut another thin strip of light blue gumpaste/fondant for the sash of the hat, moisten and attach to the hat. Now you can place some of your patches onto the hat, elbows, and along the legs of the scarecrow.
Part 2: The Jack-O-Lantern Friend and Bag of Treats

Step 1:
Take 38g of the melon colored gumpaste/fondant and roll into a smooth ball. Start with the tri tip chisel (red) and create 6 indentations from top to bottom, trying to space them out evenly. Use the pointed chisel (light blue) to soften/clean up the indentations you created on your pumpkin. Next take the large end of the bone chisel to make the eyes and the small end to make the mouth.

Step 2:
Using the mini heart cutter, cut out two hearts to use as leaves in the khaki colored gumpaste/fondant (I took a bit of the ivory and added just a touch of the khaki gel paste). Then roll out two very thin pieces for the tendrils and another small teardrop shape for the stem. Attach all your pieces to the pumpkin.

Step 3:
Roll two small balls of the medium tan gumpaste/fondant for the eyes and place in the eye sockets. With our fine detailing brush, paint some eyelashes & eyebrows with the ivory gel paste. Brush some watermelon petal dust along its cheeks and, if you want, roll a small ball of watermelon gumpaste/fondant for a nose.

Step 4:
Grab the medium tan gumpaste/fondant and form a 1” x 2” rectangle that will be a brown paper bag. Take your fingers and pinch all the edges of the rectangle to give it a worn look.

Step 5:
Moisten the top of the bag and attach some more straw.

Step 6:
Cut a small piece of the light blue gumpaste/fondant, moisten and attach to the front of the bag. Using a dotting tool, make a dot in each corner. With a detailing brush and peach gel color (I used white with a touch of tangerine) paint “TRICK OR TREAT” on the bag and use the dotting tool to apply color to the dots on each corner.

Step 7:
Next layer strips of the ivory, melon, and watermelon gumpaste/fondant and cut out several triangles to use as candy corn. Moisten the top of the bag and the left palm of the scarecrow and arrange/attach the candy corn.
And voila! You now have the most adorable edible scarecrow ever!

We hope you've enjoyed this tutorial and are inspired to try out some of these techniques in your own work! Nayda encourages all of you to customize your scarecrow to fit your personal vision. And she would love to see how people use her tutorial in their own art, so if you try out her lesson, go ahead and post pics of your creations on her Facebook page!
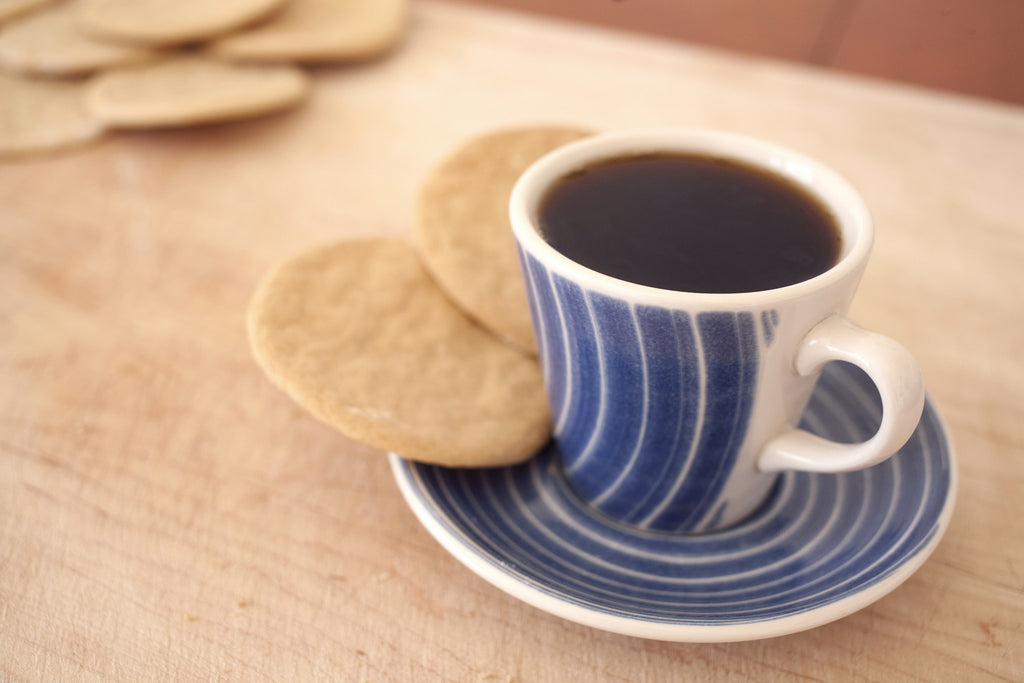
Simple Sugar Cookie Crisps
Sometimes you don't want a lot out of cookie, just a plain and simple "serve with your tea" style cookie. And sometimes you just want to get right down to the fun part- the decorating, and you don't want to spend a lot of time on the making and baking of the cookie part.

These simple, three-step Sugar Cookie Crisps are the perfect versatile cookie- they're simply delicious all on their own, and they make a great cookie base for decorating.

Ingredients:
- 1/2 cup Earth Balance buttery spread
- 1 1/4 cup sugar
- 2 1/2 cups flour
- 1/8 cup vanilla almond milk
- 1 tsp pure vanilla extract
- 1 tsp baking soda
- 1 tsp baking powder
- 1/2 tsp salt
Step One: The Soggy Stuff


Cream the sugar and Earth Balance together. Then add the almond milk and vanilla extract and stir until it's all well combined.
Step Two: The Doughening


Add your remaining dry ingredients- salt, soda, baking powder, and flour- and mix until thoroughly and evenly combined. You should have a nice dough.
Refrigerate for at least an hour.
Step Three: Cookies!


Flour a flat work surface. Roll out your dough to about 1/8" - 1/4" thick. Cut out your shapes and place them on a cookie sheet. Bake at 350 degrees fahrenheit for about 8 minutes. They're done when the edges just begin to golden.

Use a spatula to remove them from the cookie sheets and place them on cooling racks while they're still warm. If you let them cool too much they can be hard to get off the sheets, especially if you rolled them out thinner.
And now you either have delicious crispy sugar cookies, or you are ready to begin decorating!
