Beyond the Box- Customizing your Sugar Structure Kit
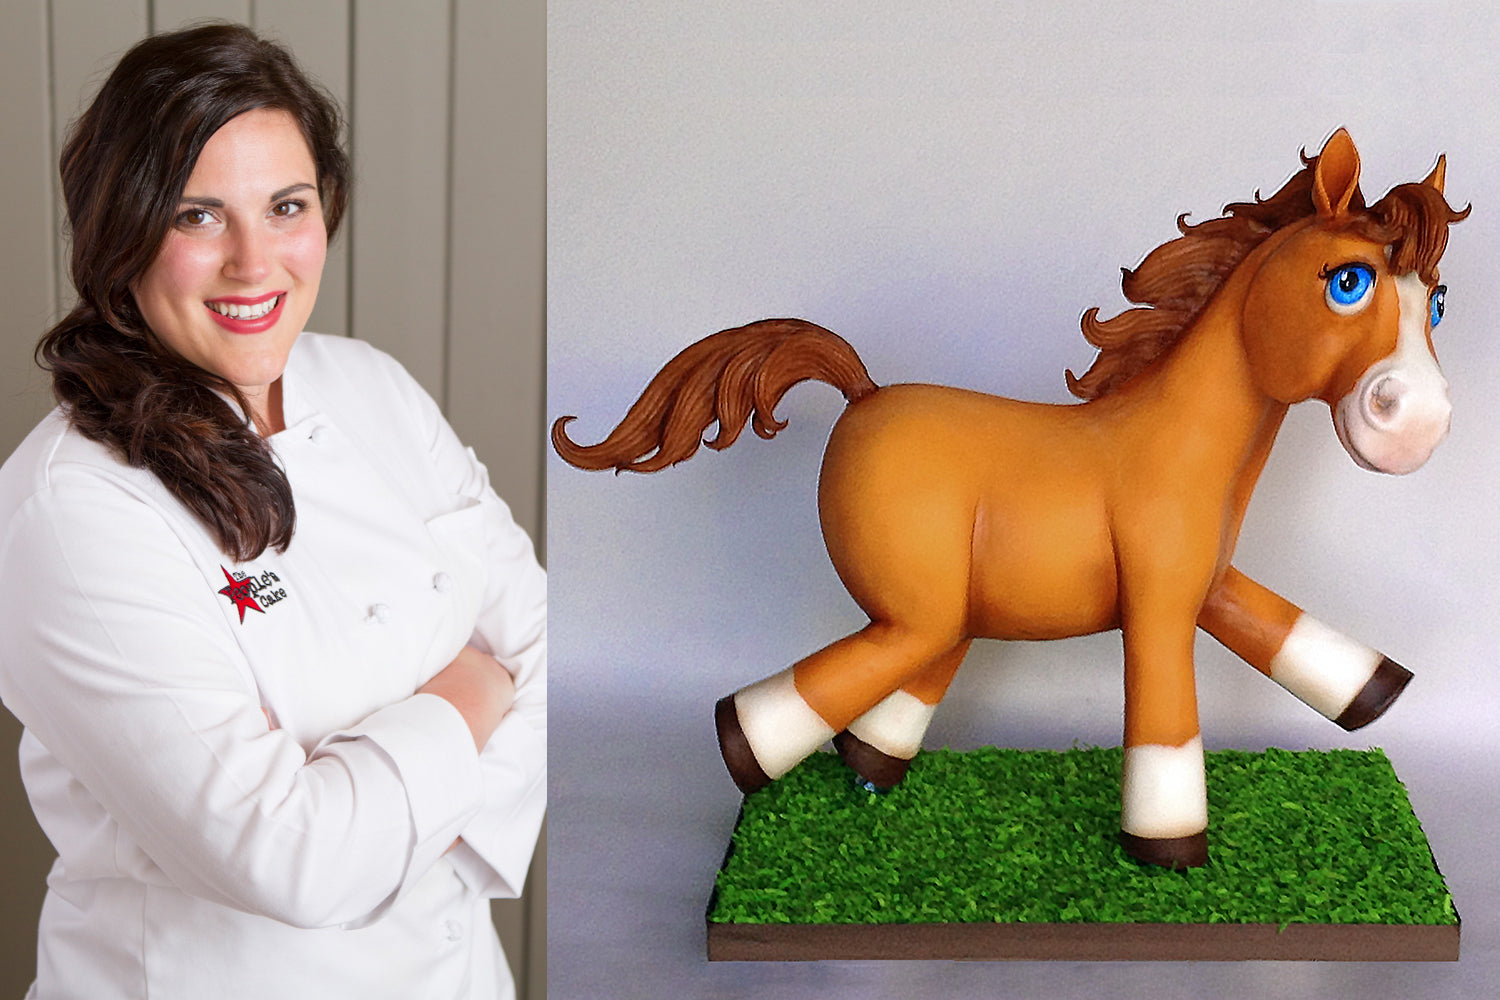
One of the greatest things about Sugar Structures cake armatures is that they are completely interchangeable. Just like Legos, the pieces fit together any way you can imagine- you can combine kits, omit pieces, rearrange things, and buy add-on parts. You can replicate the image on the box, or do something totally different. Today, cake superstar and Sugar Structure co-conspirator Kaysie Lackey is going to show you how she started with our 4 Legged Standing Sugar Structure kit, added a few parts from Expansion Packs, and created the galloping cutie Petunia the Pony.
Petunia the Pony Supply List
- Base board - 12" x 16" plywood (1/2" thick) + 12" x 16" foamcore (1/4" thick)
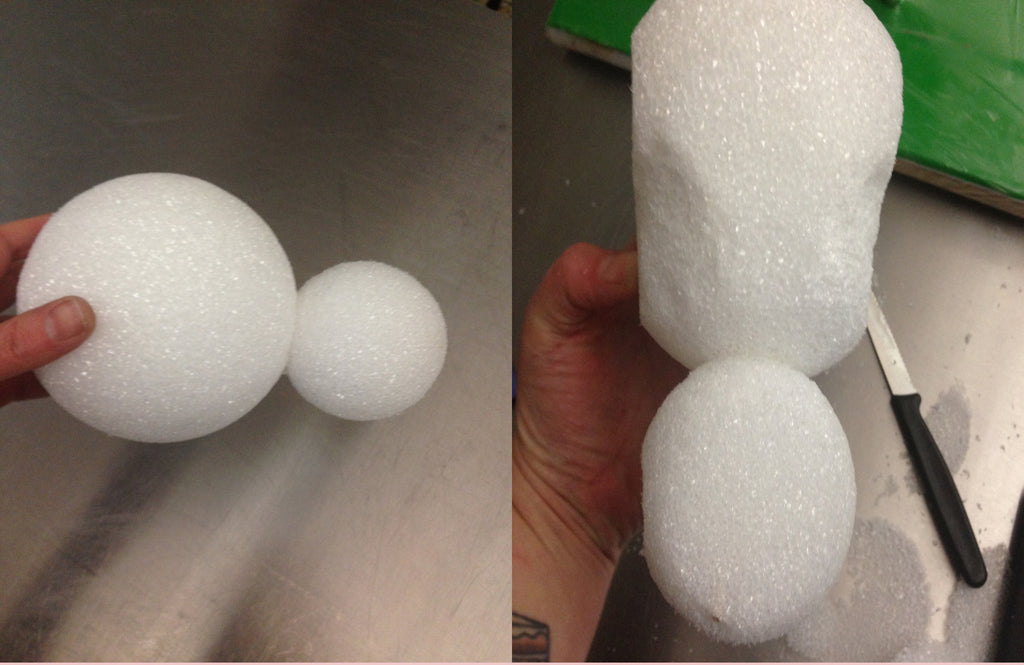
- Head - 4" styrofoam ball + 2.5" styrofoam ball
- Cakes - 9" x 7" (3)
- Front leg - 150g modeling chocolate (2)
- Back leg - 200g modeling chocolate (2)
- Cheeks - 100g modeling chocolate (2)
- Neck - 250g modeling chocolate
- Mane & tail - 200g modeling chocolate
- Body covering (colored) - 1200g blend (800g fondant + 400g modeling chocolate)
- Body covering (white) - 225g blend (150g fondant + 75g modeling chocolate)
- Cake boards - 8.5" x 11" foamcore (2) cut to custom shape
- Sugar Structures 4 Legged Standing kit
- Sugar Structures expansion parts- corner couple, 30* angle, 1" rod, 2" rod
- 1/4" armature wire (length = however long you want your pony's tail)
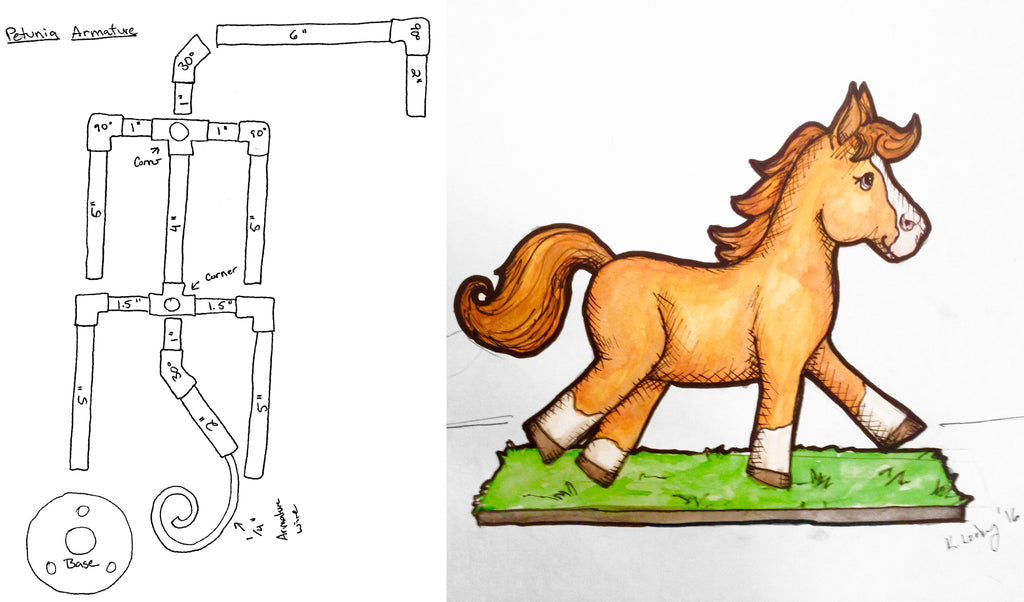
The first thing I do with any sculpted cake is sketch out my cake design and then outline how the armature will be constructed. Determine where in your design you'll need straight lines (rods) and where you'll need angles and bends or breaks in the lines. Measure the parts of your sketch where the rods will go so you can scale up in your armature design without losing proportion.
For Petunia, I kept her basic shape in line with the standard 4 Legged Standing Sugar Structure kit design, but I added a few parts from Sugar Structure Expansion packs to give her a nice horsey tail.
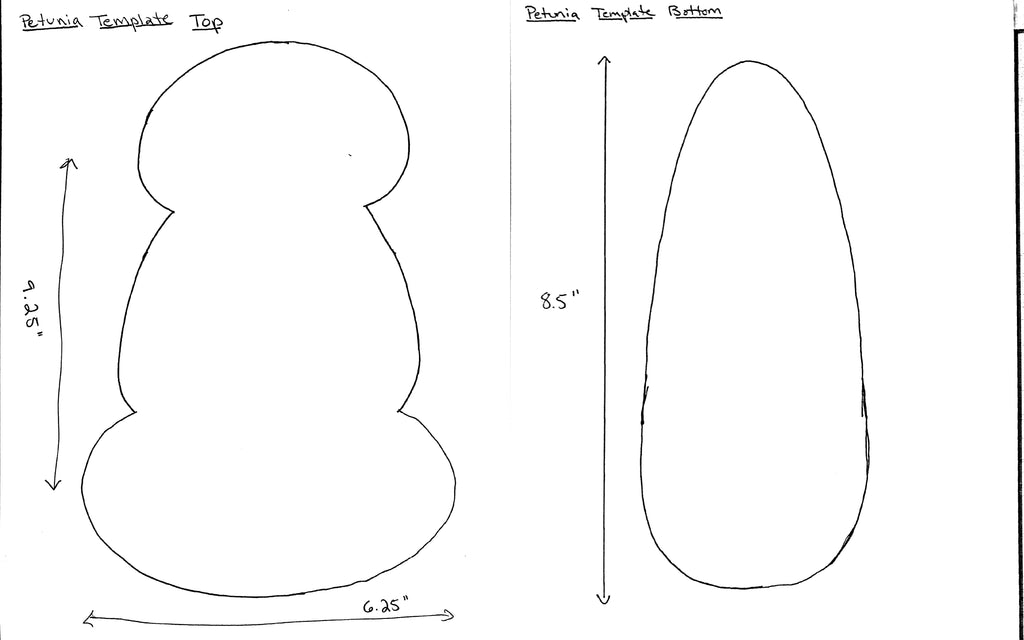
The next thing you'll want to do is determine what parts of your design will be made from cake and where you will need boards to support the cake. Generally, when I make animal cakes like Petunia, or like the Mollie Moo cow on the box of the 4 Legged Standing kit, I make the body out of cake but use foam for the head. I find you get so few usable servings out of the head that it's not worth the trouble of carving it out of cake. So my cake boards for Petunia are going to rest along the "spine" of the armature to support the mass of her torso.
Next you'll draw out templates for your cake boards. To determine the size and dimensions of your boards go back to your armature design sketch. Add up the lengths of the longest and widest areas that your board will need to cover. And don't just add up the rod lengths; the elbows and connectors will add some length as well. Once you have your dimensions, look at your drawing of your cake and think about the shape you'll be carving the cake into.
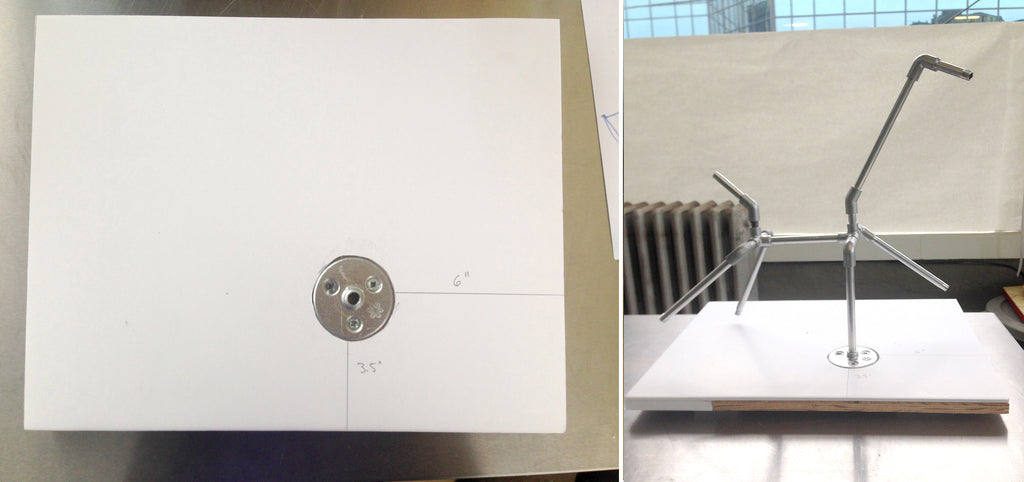
Now you're ready to start constructing. Think about what part of your cake is touching the "ground" (for Petunia, it's her front right hoof) and where on the space of your baseboard that part will need to sit. This is where you will affix your Sugar Structure base piece. Make sure to measure so no part of your cake (like her back hooves) winds up off the board. I like my "ground" to be flat and even, so I generally cut a sheet of foamcore to the size of my base board and cut out a circle where the armature base piece will be. This makes the hardware flush with the surface of the foamcore (or the "ground" of my cake). Then assemble your armature and thread it into the base piece.
Now we put the cake boards onto the armature. You'll notice in my templates I have a top and bottom board. You're going to sandwich your boards around the structure. The two pieces really need to come together flat and touching, so we need to hollow out space for the armature to nestle into. I use 1/2", or 10mm thick foamcore for my boards so I have enough space to hollow out gullies for the hardware without the boards breaking. And remember to measure! I trace my armature to get an accurate layout on my boards, but I still go back and measure and draw out final cut lines before I start hollowing. Care and precision will save you time and frustration in the long-run.
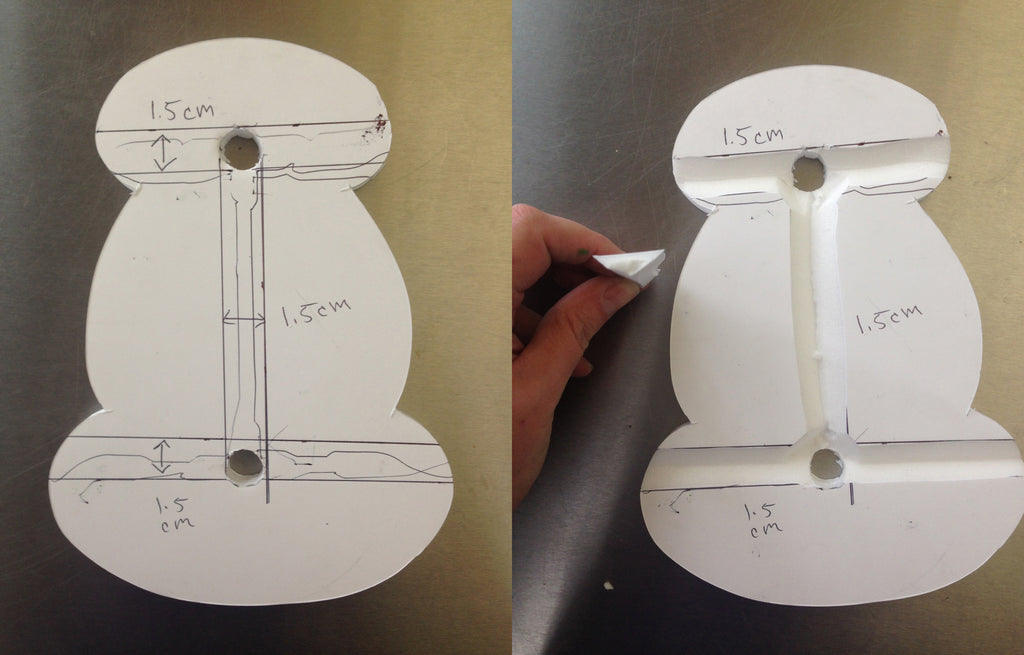
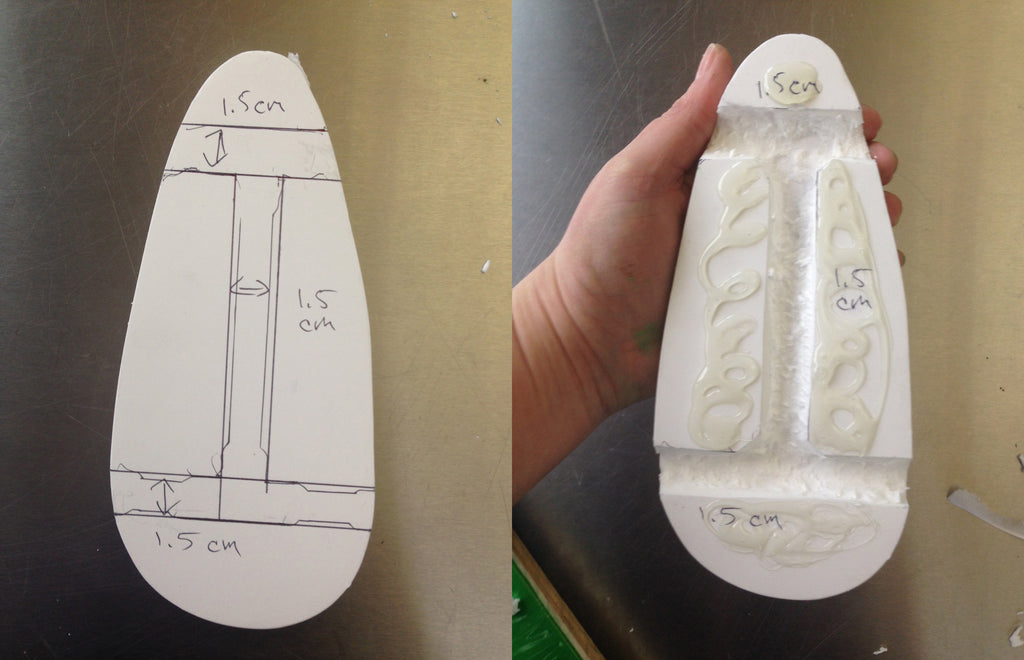
Use hot glue to stick the boards together around the armature. And don't be stingy- stick 'em good!
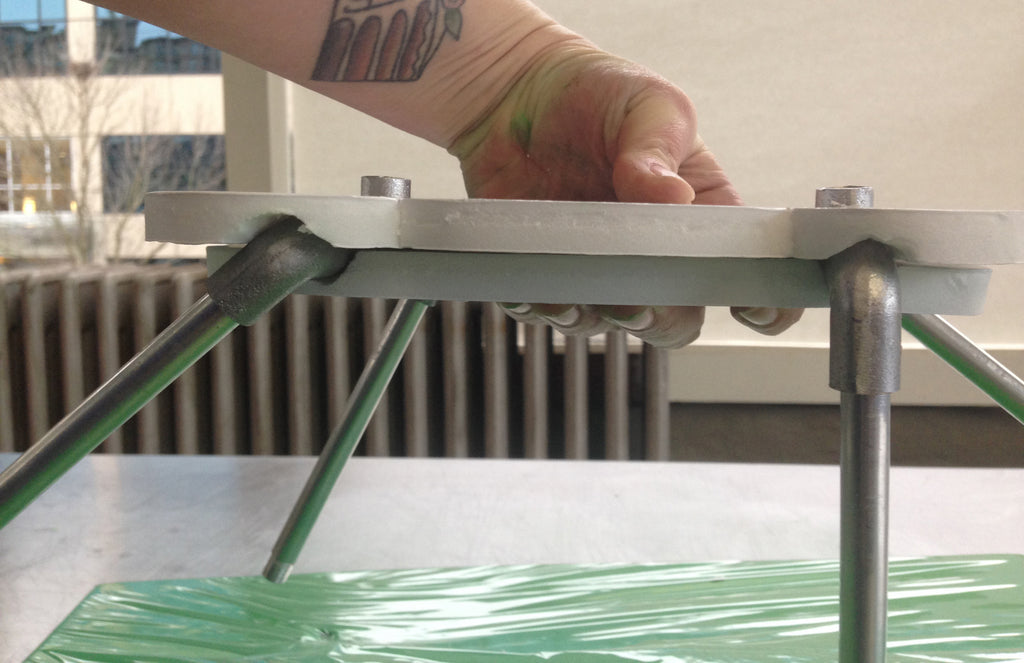
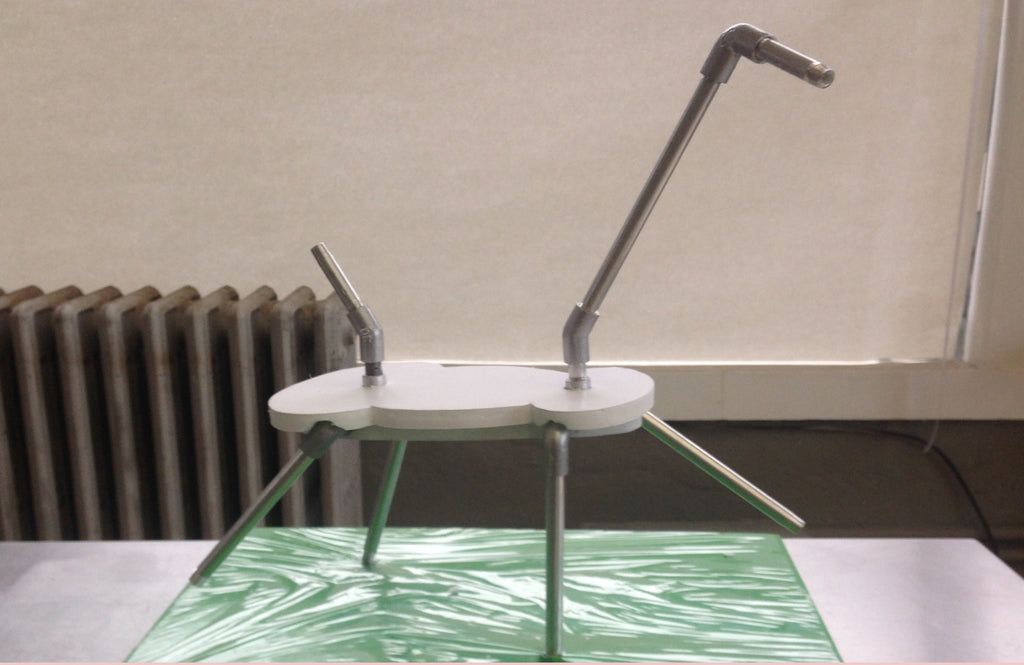
Once the glue is set on your boards you're ready to stack the cake. Notice that I've got 2 pieces of armature poking through the cake boards- the neck and the tail. Don't try to slide your cakes over them- that's a recipe for disaster. And by disaster I mean broken cakes, and broken cakes are harder to carve and keep neat. So instead, I cut out a sliver of cake wide enough for the hardware at both ends. This allows me to neatly lower the cakes onto the board. And remember again- always measure.
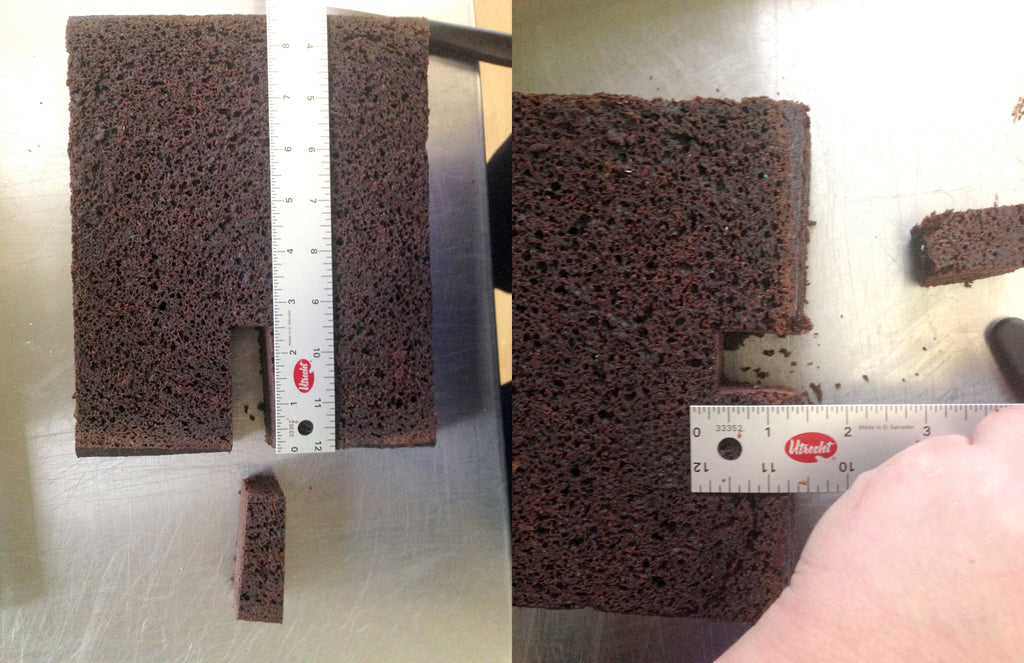
But don't eat that sliver you cut out! (I know it's tempting) You're going to add it back in so there isn't a gap when you carve.
Once you've got your cakes stacked, pop it back in the fridge for a bit. The colder your cake is the easier it will be to carve. I like to carve with an 8" bread knife. Reference your sketch while you're carving to keep yourself on track and think about how your creature will look from all angles- your sketch is 2D, so your cake will have shape and depth that isn't visible in the sketch.
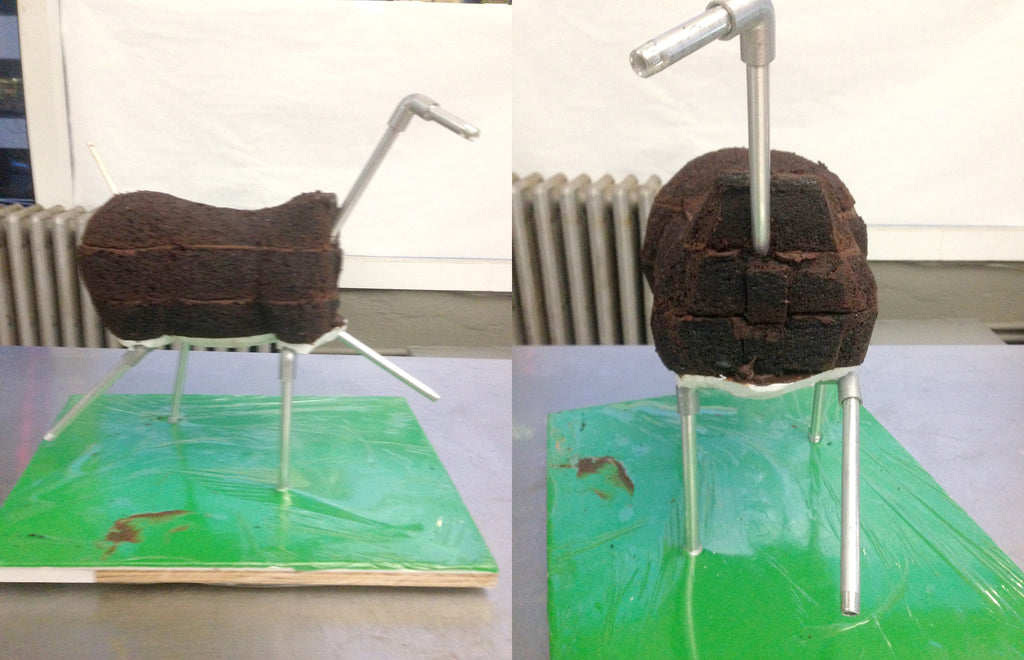
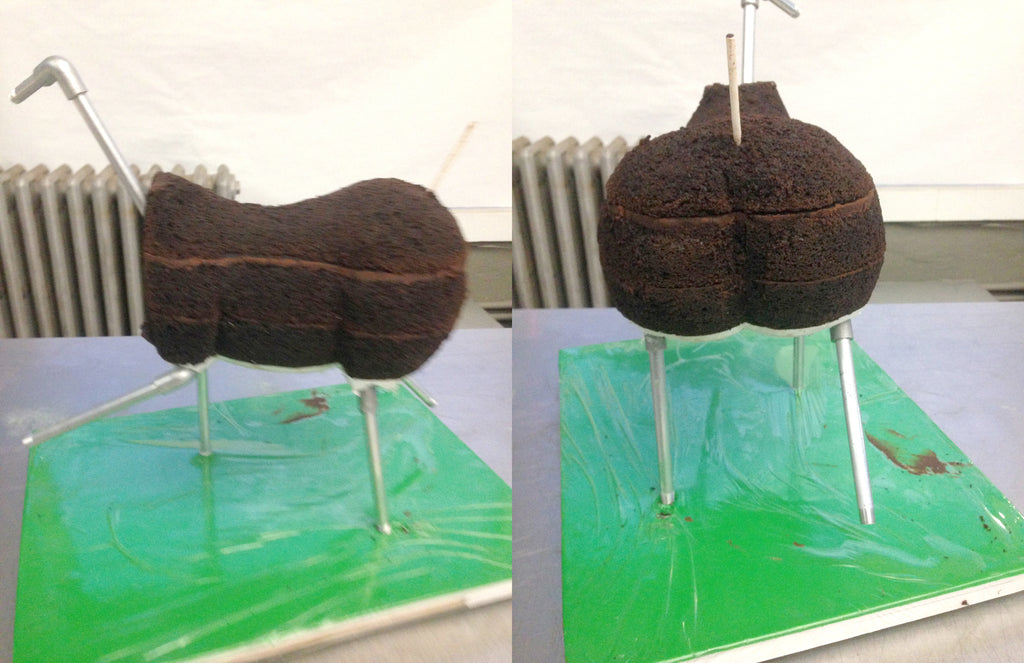
Once you've got your cake carved, cover it with ganache and stick it in the fridge while you prep the head. The foam is tougher than cake, so switch to a smaller serrated knife so you have more control. Use your sketch again as you're shaping the foam, but it can also be helpful to reference photographs of the type of animal you're making. This can give you a sense of the underlying structure you're mimicking. Don't try to get overly detailed with the foam- you're going to be building it up with modeling chocolate and covering it with your blend. Carve just enough to get a basic structure.
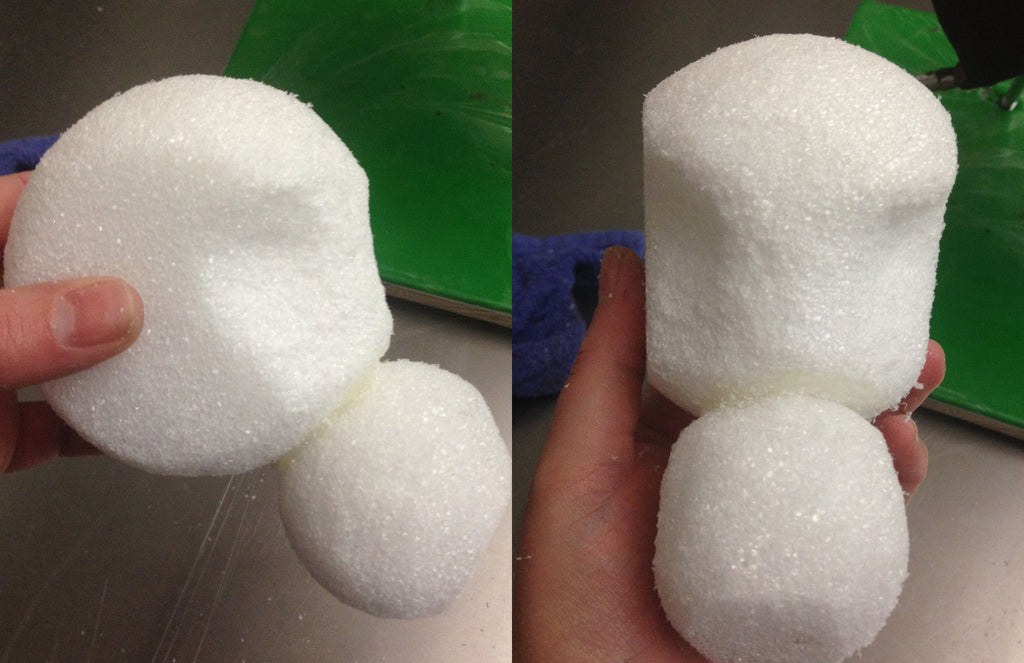
Now we'll move on to all of our modeling chocolate parts. You're going to use 150g of modeling chocolate for each front leg and 200g for each back leg. Roll each portion into a slightly conical cylinder. Each leg is going to fit around the rods of your armature, so slice each open length-wise and cut out a hollow space for the armature.
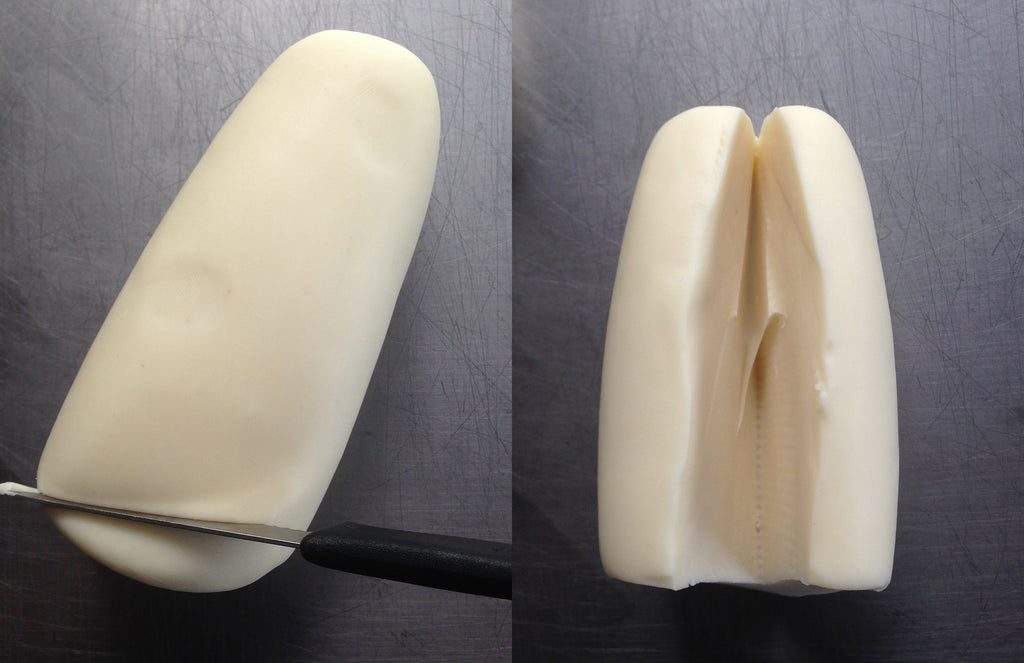
Now do pretty much the same thing for the neck, just cut off a bit of the top at an angle to fit against the head.
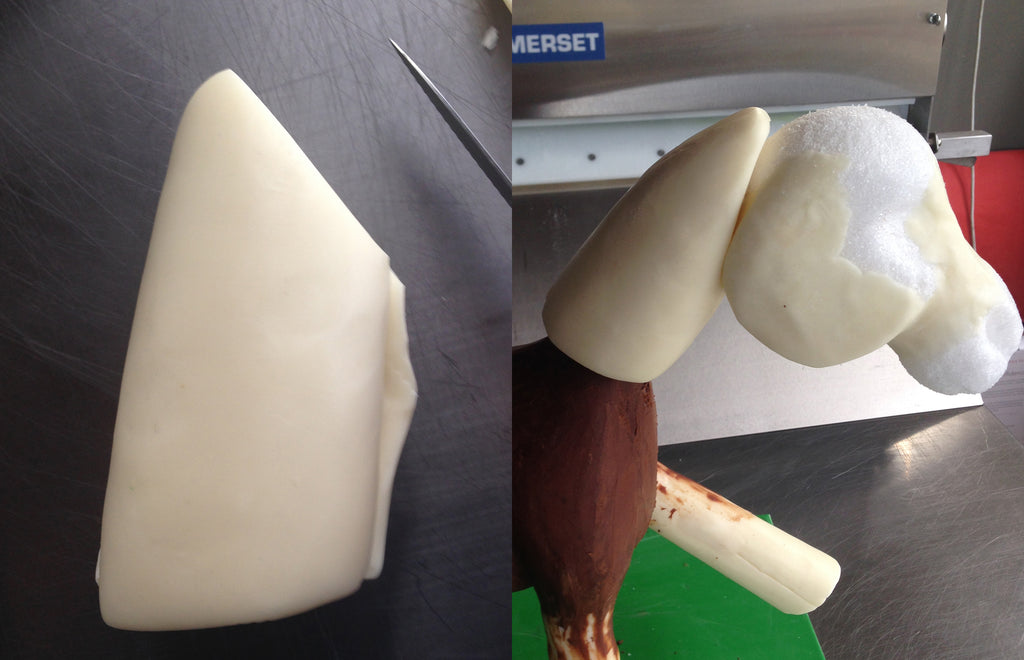
Now add some modeling chocolate to the foam to build up her cheeks and work the chocolate of her face and neck into a smoother, more horseneck-y shape.
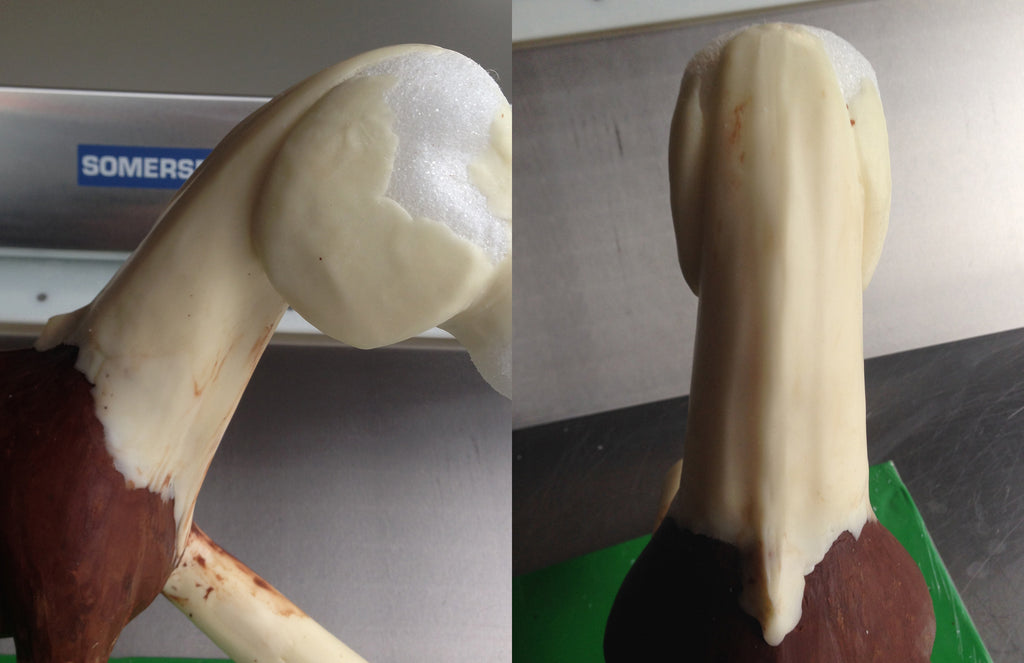
Once you've got everything shaped and smoothed, cover the body with your colored fondant/mc blend. Sugar Smoothers work really great for smoothing out the product on sculpted cakes because the flexibility of the thin smoother allows it to bend around the odd curves of an atypically shaped cake. Use your fingers to get into the creases and tiniest spaces, but be gentle so you don't leave marks.
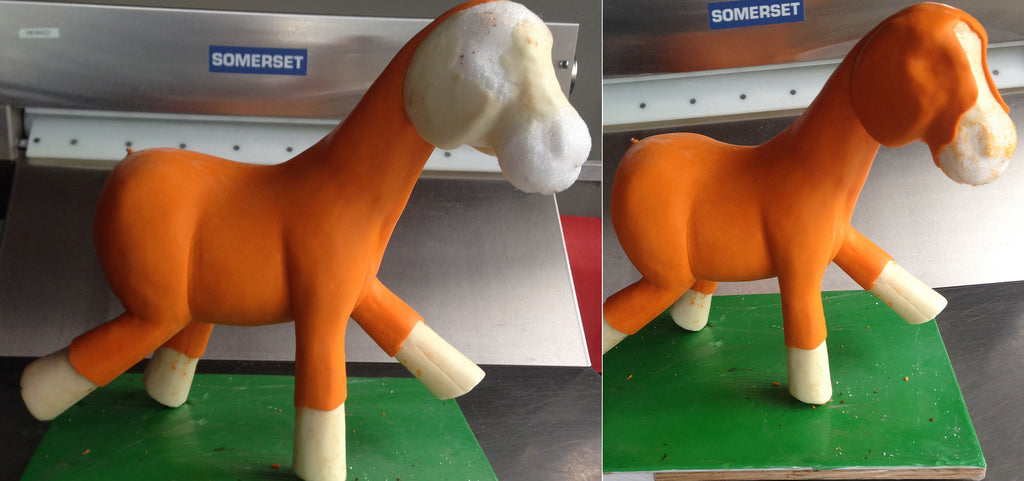
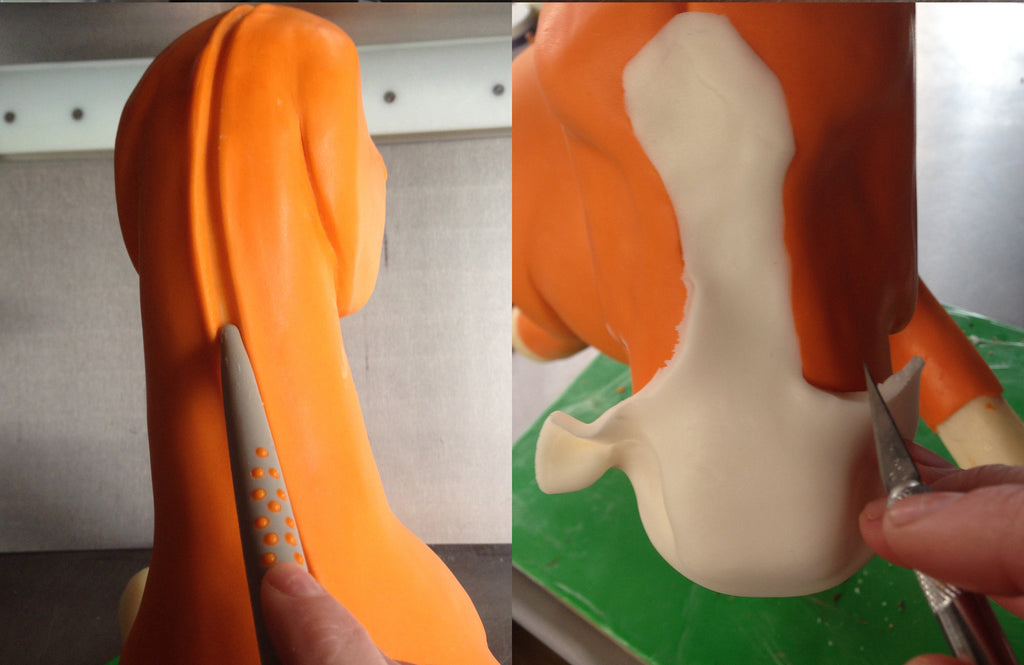
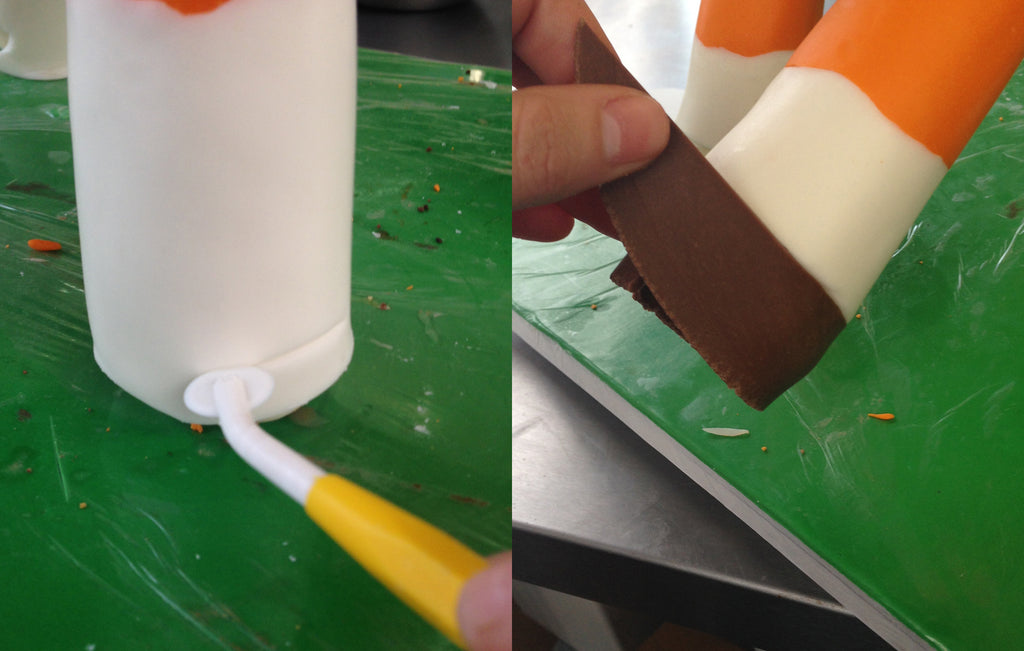
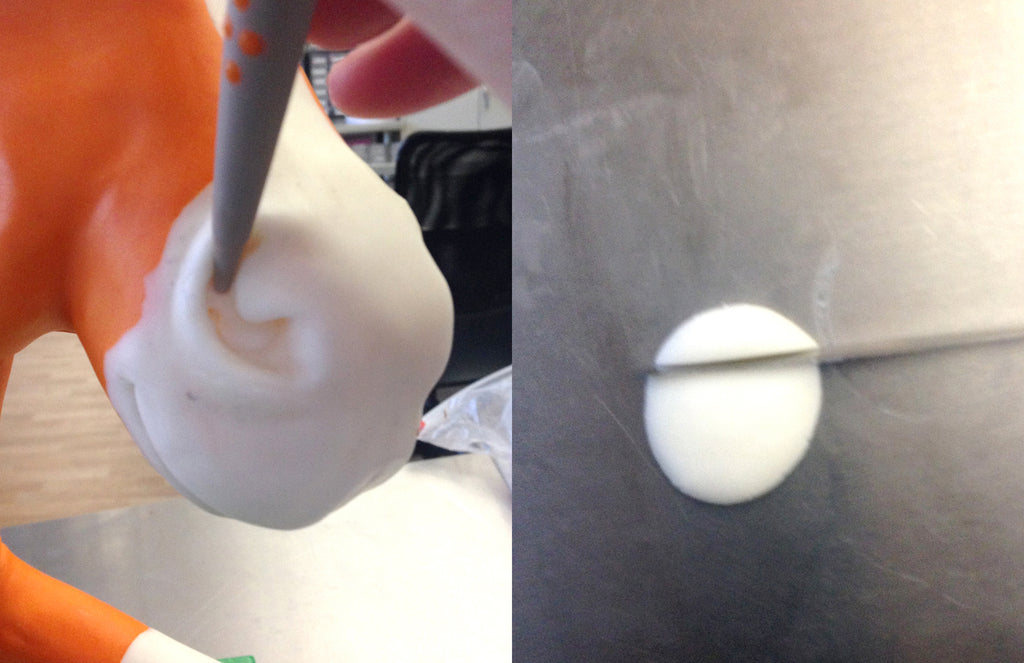
Now comes the funnest part- adding in all the details and character that make your cake truly unique. Start with adding the white blend to her nose and feet. I also use my bone chisel Sugar Shaper to mark out a center line from her head down her neck. This helps me get her mane where I want it later on.
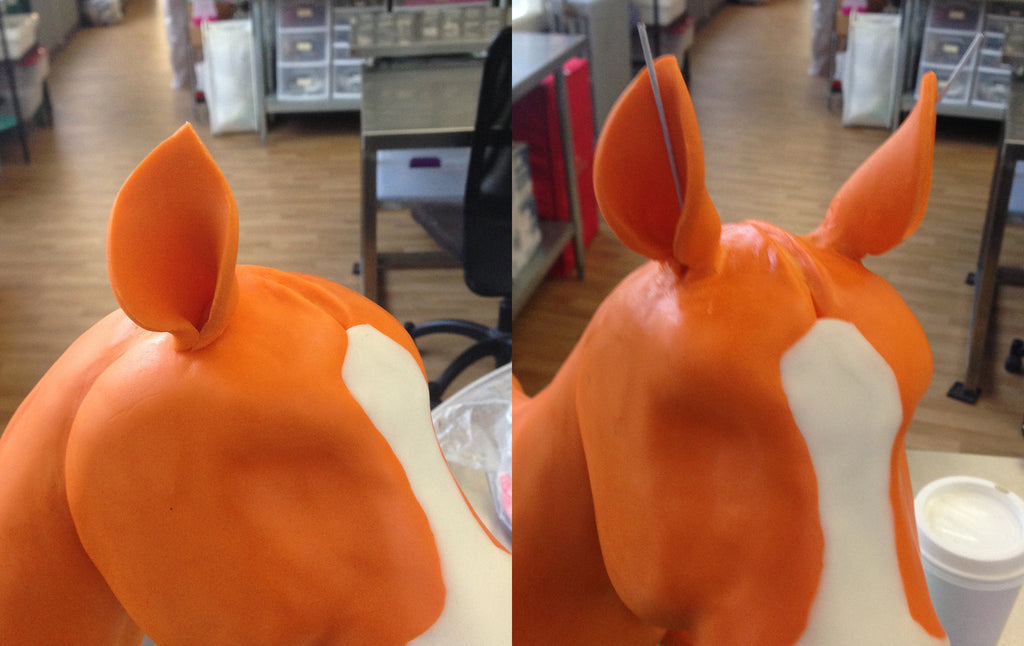
Now let's give her some ears. Cut out 2 tear-drop shapes out of your colored fondant. Attach each ear by pressing down one side of the rounded end of each tear-drop then folding the ear around so that it sticks up. Use a piece of thin wire to keep each ear standing up while the blend dries and firms up.
(pro-tip: I'll actually leave those wires in the ears, or any other small part I've used them for, until the cake is ready to be displayed. Fragile parts like these ears can break or wilt during transit just from the motion of your car. And I hate doing repair work upon delivery.)
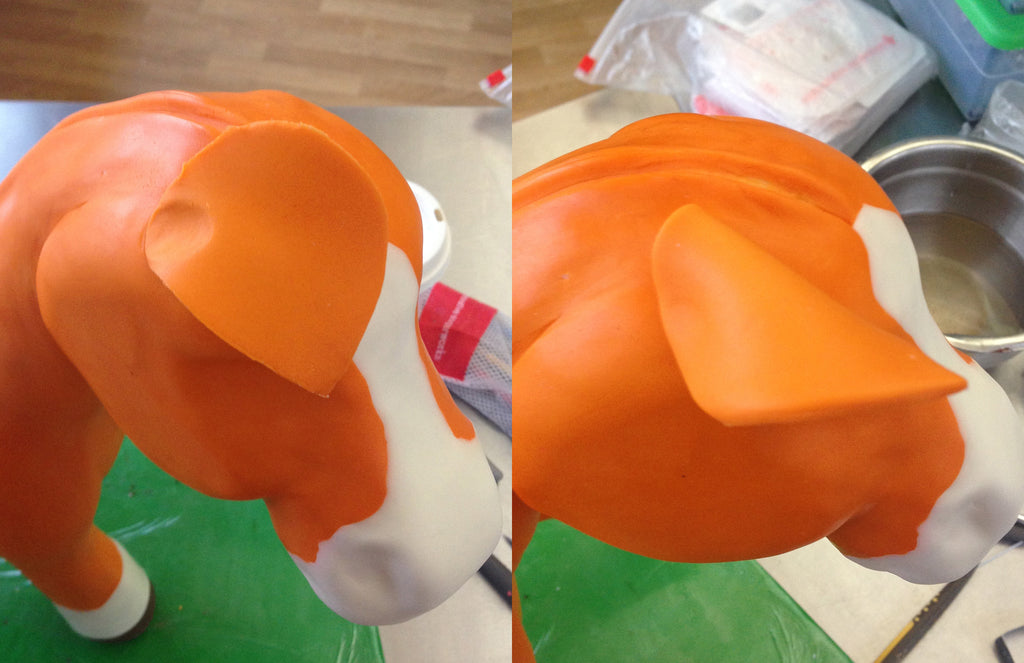
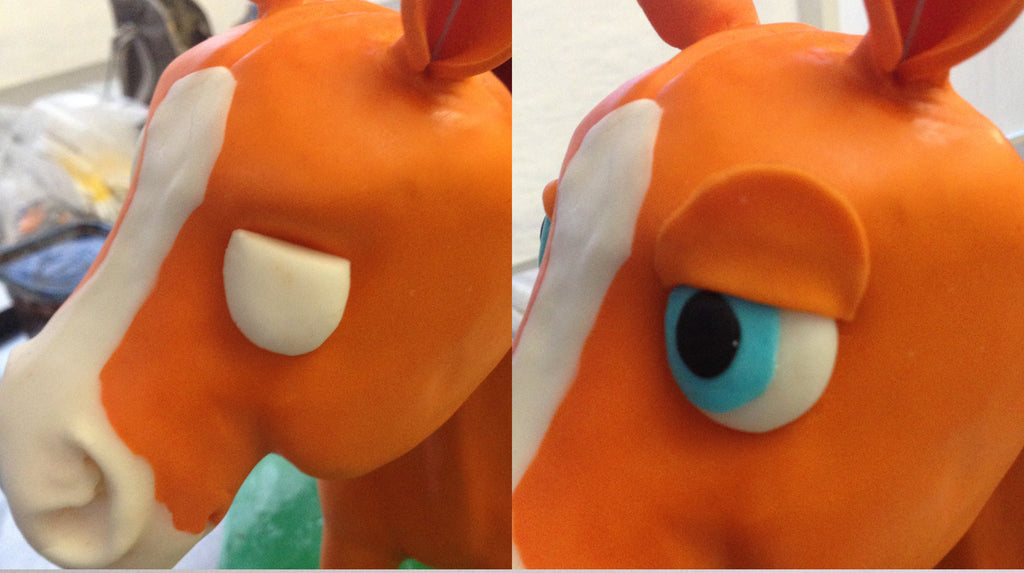
Now add in her facial features using your Sugar Shapers and leftover pieces of your fondant/mc blend.
Then just give her whatever style mane and tail you'd like her to have, dust on some color for depth and detail, and you're finished!
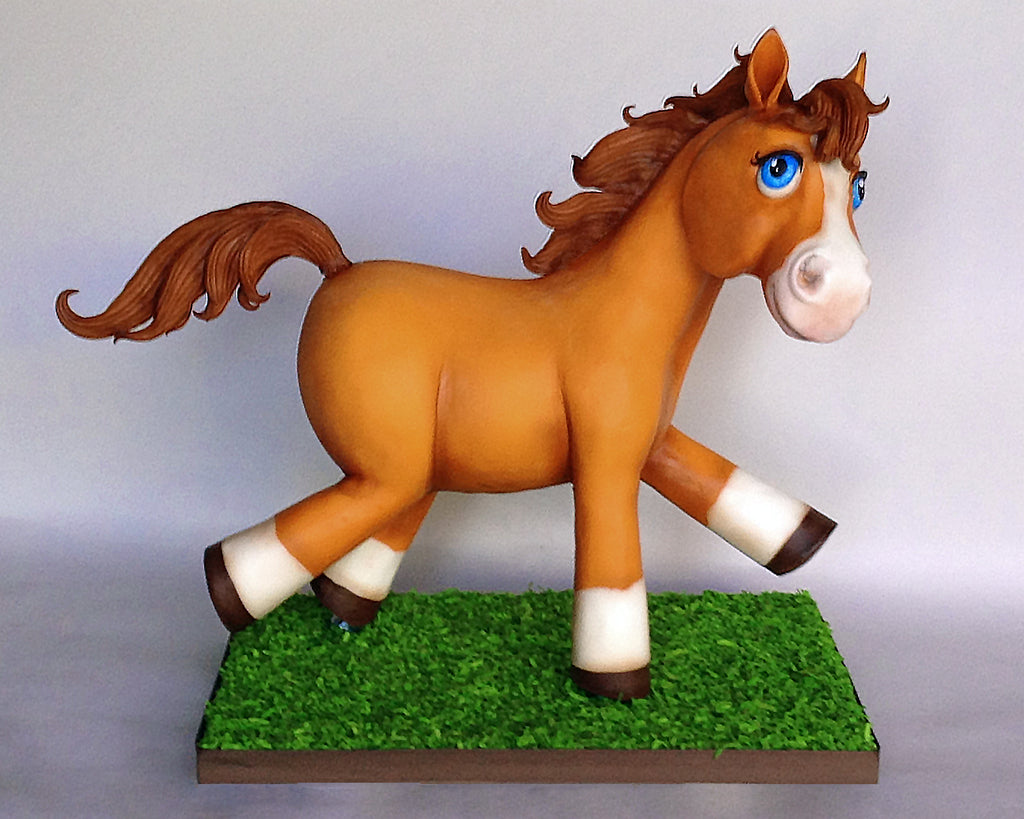
I hope you enjoyed this little peek into sculpting 3-dimensional character cakes on a Sugar Structure armature. Now get sculpting, cakers!
Products
View all
