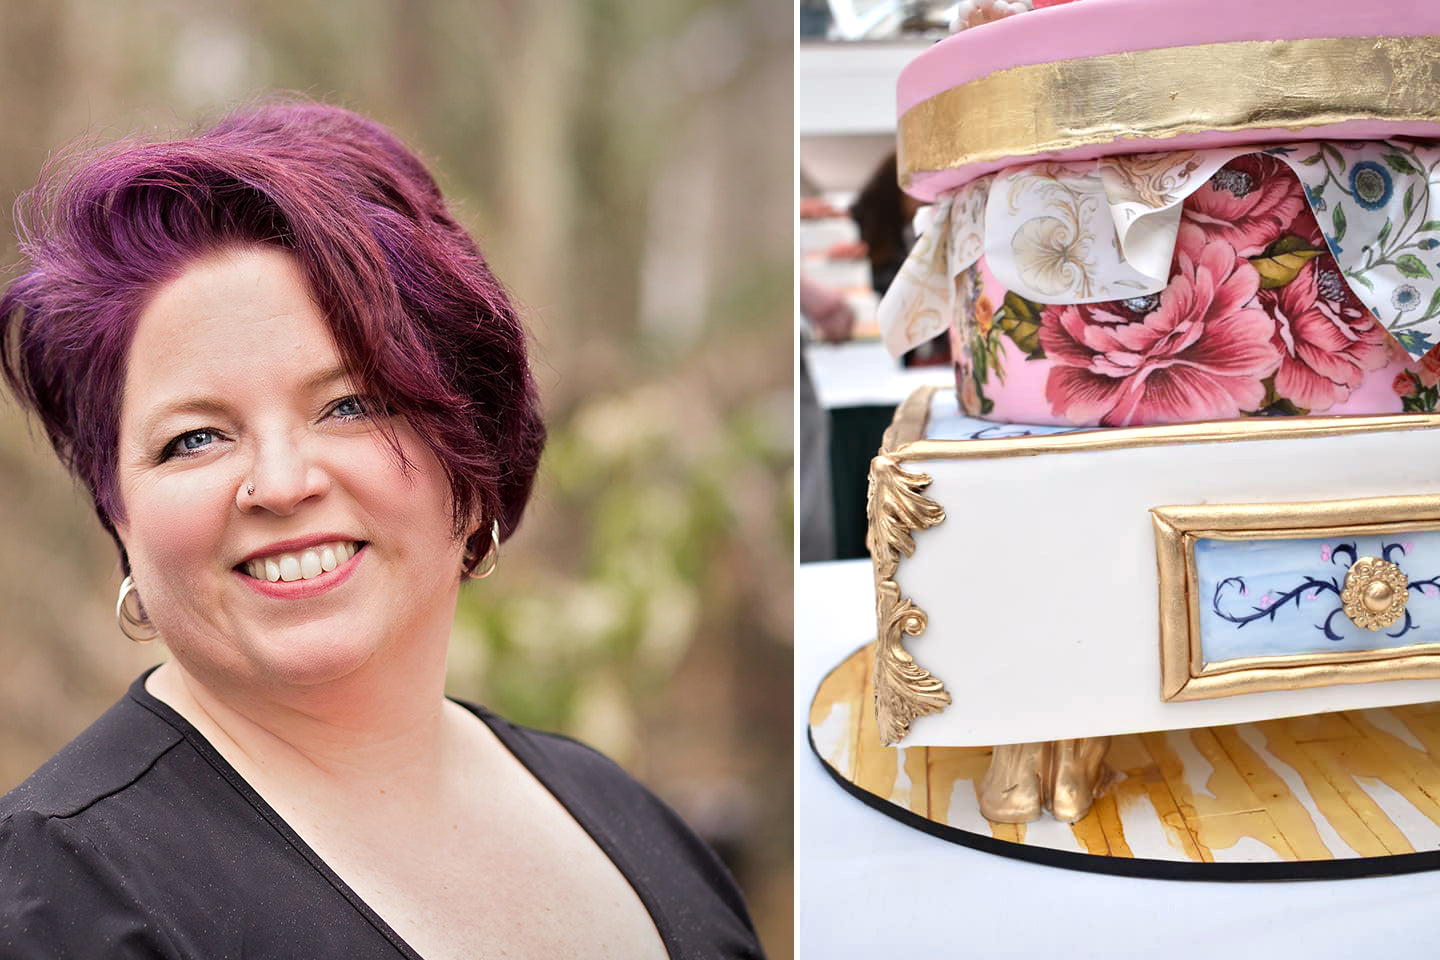
You probably know her as the face of Shinyball Cakes and Shinyball Creations- Rose Brown is a life-long artist and baking dabbler. Rose discovered the strong connection of sugar and art, and has been working on her sugar art skills for the last several years. Always trying to think beyond the traditional, looking for unique techniques and with a special love for hand painting, she creates cakes for friends, family and clients that are one of a kind. She also writes a blog - www.shinyballcreations.com - that shares tips, tricks and tutorials for sugar and baking enthusiasts. And this month, Rose is sharing her blogging expertise with us at Sugarworks, and we couldn't be more excited!
Read on for an excellent journey through bringing a concept into a finished cake as well as a step-by-step tutorial on the very unique technique of cake decoupage!
Have you ever entered a cake competition – a themed competition – and then been totally stumped on what to create? I have…and very recently!
I entered a local cake show competition where the theme was “Glitz and Glamour”. Glitz and glamour… visions of glitter and shiny things everywhere! But then reality set in. I had to face it – I’m not a glittery, fancy, embellishing kind of girl. It didn’t speak to me. That left me in a bind – what on earth was I going to do??
Well, like all internet addicts, I turned to Pinterest. However – here is a tip – don’t EVER (I really mean ever) search for cakes on Pinterest when you’re looking for inspiration. I have gotten that advice from other cake artists as well. Get your inspiration from art, fashion, pottery, paper crafting – anything but other cakes. It will open things up for you and give you ideas that will be uniquely yours as you envision your own designs.
Anyways…on to my Pinterest-ing. I searched for “glamour”, I searched for “Grace Kelly”, and that took me to looking at jewelry, which led to jewelry boxes, which led to vintage jewelry boxes, which led to perfume bottles, and in looking at all these pictures I started to form my concept. The image that solidified my concept was that of a vintage looking vanity table.
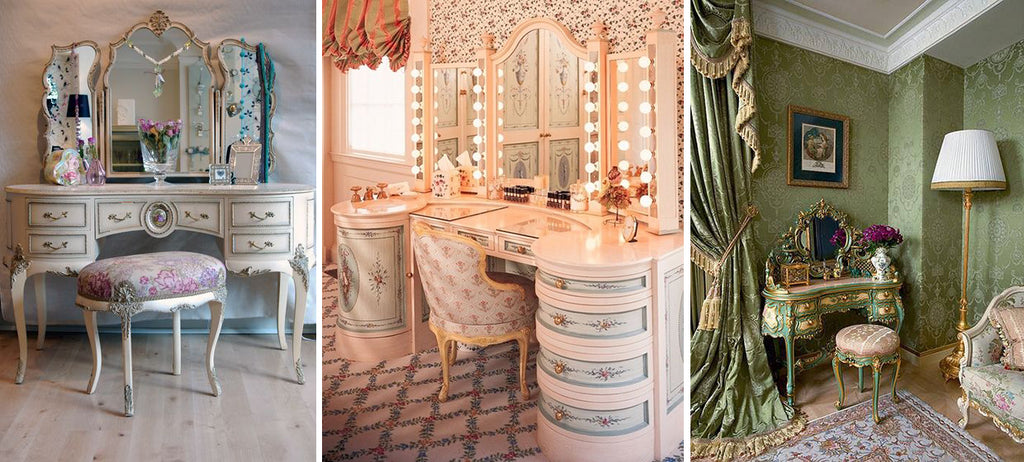
And from there, everything else fell into place. I could finally visualize what I wanted to create.
Initially, the concept was a table with a stack of things on it – a large jewelry box and an oversized perfume bottle with flowers. I did a sketch and started working, but as so frequently happens to me, I changed midstream, because the way the cake was coming together needed something else.
I’ll be honest here, some of the change came about because of the size requirements of the competition, the base HAD to be 14”, which is relatively big (which will lead to some of my equipment choices you’ll read about later, hint hint). I needed something that size-wise would fit between a jewelry box and a table. In thinking about my Grace Kelly pins from earlier, I thought about a hat box – I had the right size dummies ready and available! I started looking at pictures of hat boxes and found inspiration in ones that had decoupage on them.
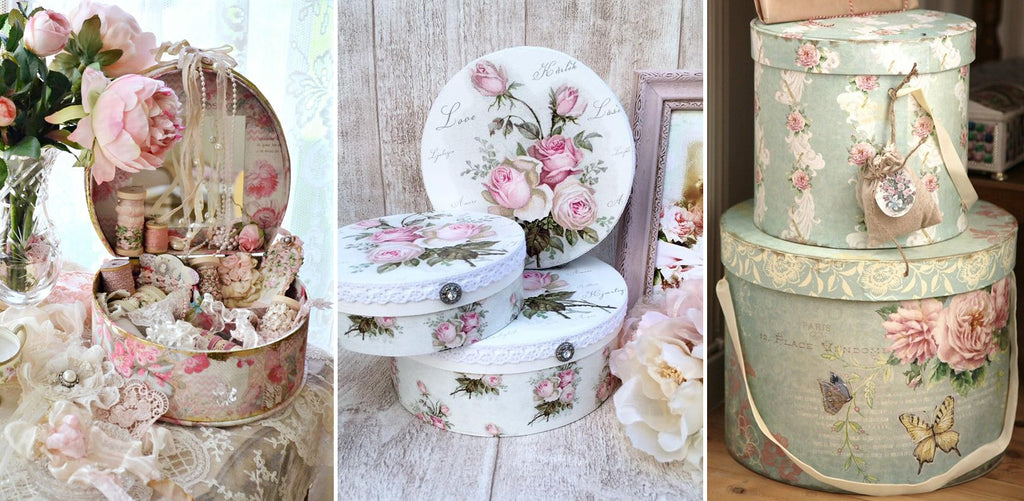
Decoupage is a form of collage that is usually used to cover items that are 3 dimensional, like boxes or even furniture. In the traditional form, you cut paper images out of thin paper and then paste them onto your item and coat everything with a layer of glue, or modge podge or other transparent adhesive that dries clear, and usually a bit shiny, but not always. I have enjoyed this kind of crafting before, so I thought – why not on my cake, and why not on a hat box tier? Poof, I had my idea!
Now I’m going to show you how I did it!
What you will need:
For any cake decoupage project, you will need the following: 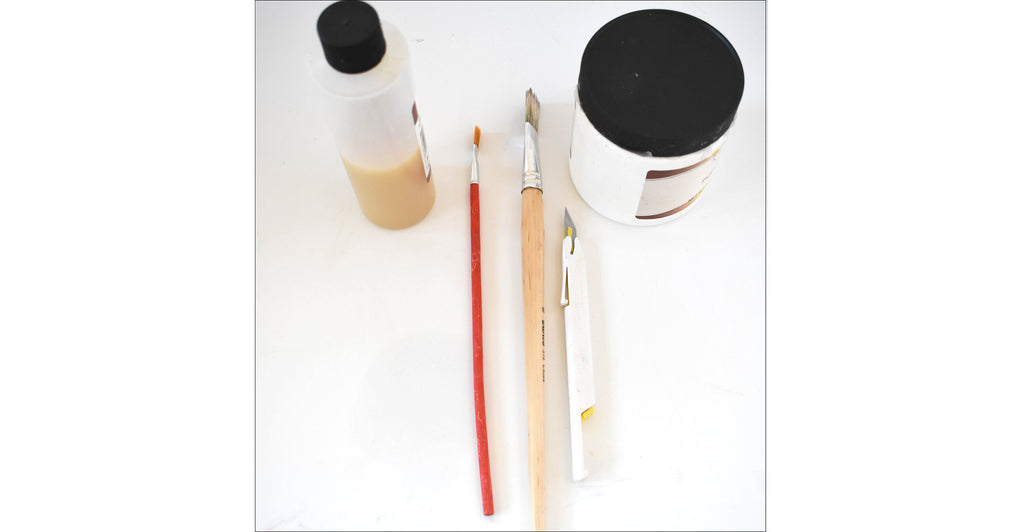
- Some sort of cutting blade or exacto knife
- Piping Gel
- Confectioners Glaze
- A small flat brush
- A large brush
- Wafer paper (not pictured)
- Edible ink printer (not pictured)
- Fondant Smoother (optional, not pictured)
To make life easier, especially for the size of cake tier I was creating, I also used my Innovative Sugarworks Artist Turntable, and my Innovative Sugarworks Turntable Expander.
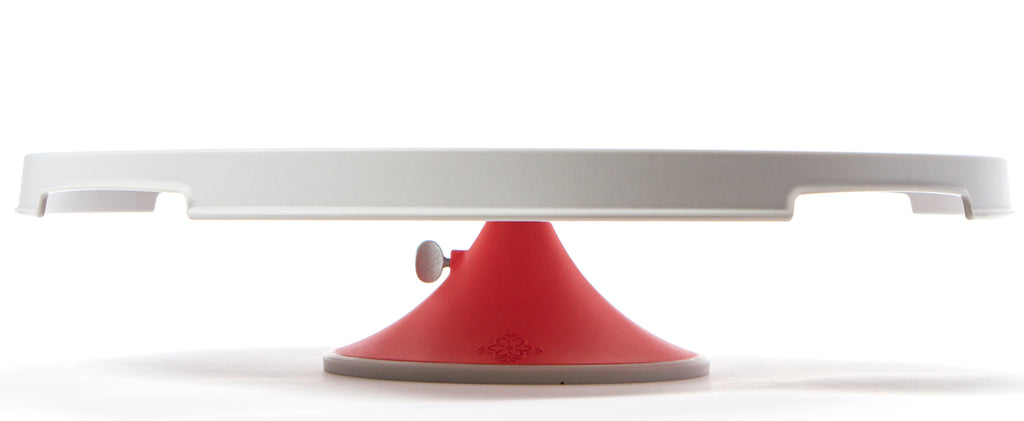
The fact that I could lock the turntable in place when working on small details and then loosen it to be able to rotate it was great. Never mind that the cake base was over 16” in diameter, so when I needed to work on the cake board or the vanity table tier, the expander was also a great help – no balancing acts needed!
Get prepped:
The first step here, is to cover your cake with fondant. In my case I covered a 4” high 12” dummy for the box and a 1” high 14” dummy for the lid. I recommend doing this step a little ahead of time from your decoupage project, so that the fondant firms up a bit. Otherwise, you may dent the fondant as you work.
Go online:
I’m going back to Pinterest again! I searched simply for “decoupage flowers” and a treasure trove of things showed up, like this one!
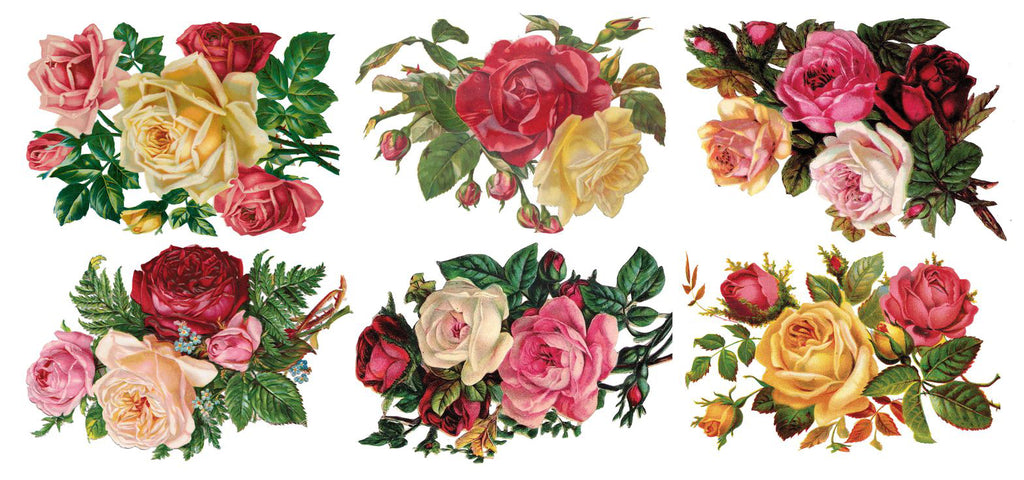
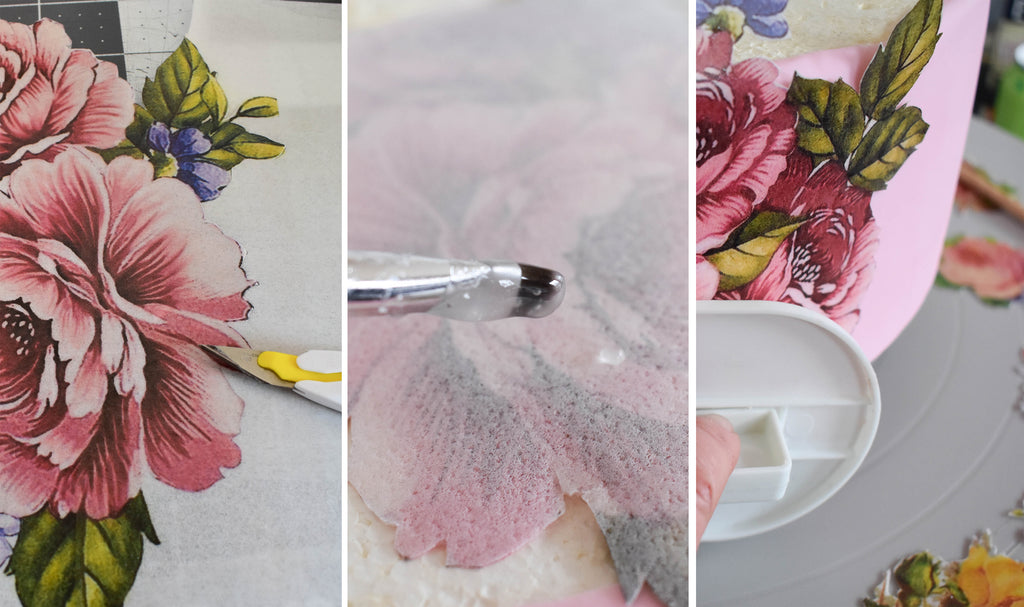
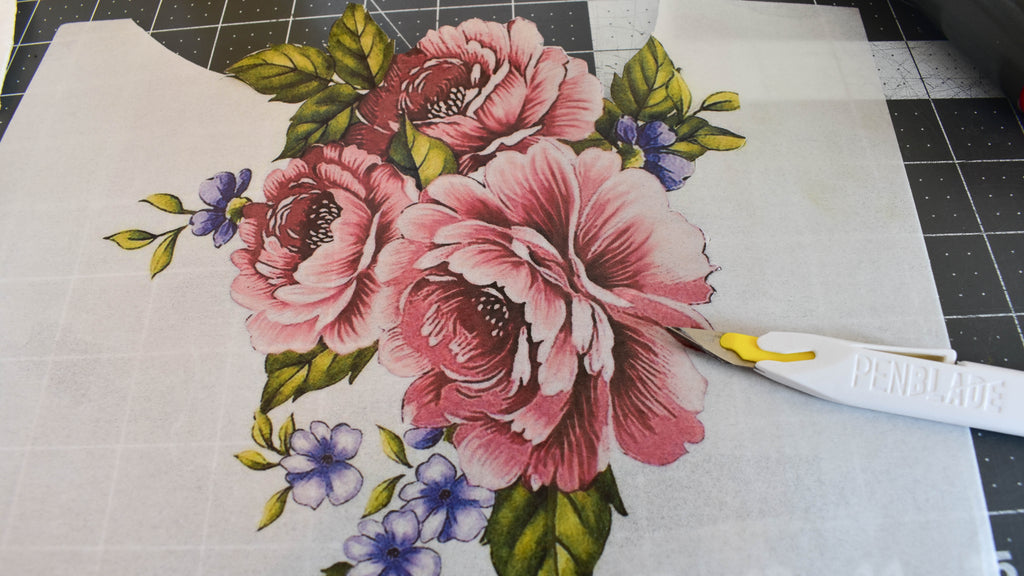
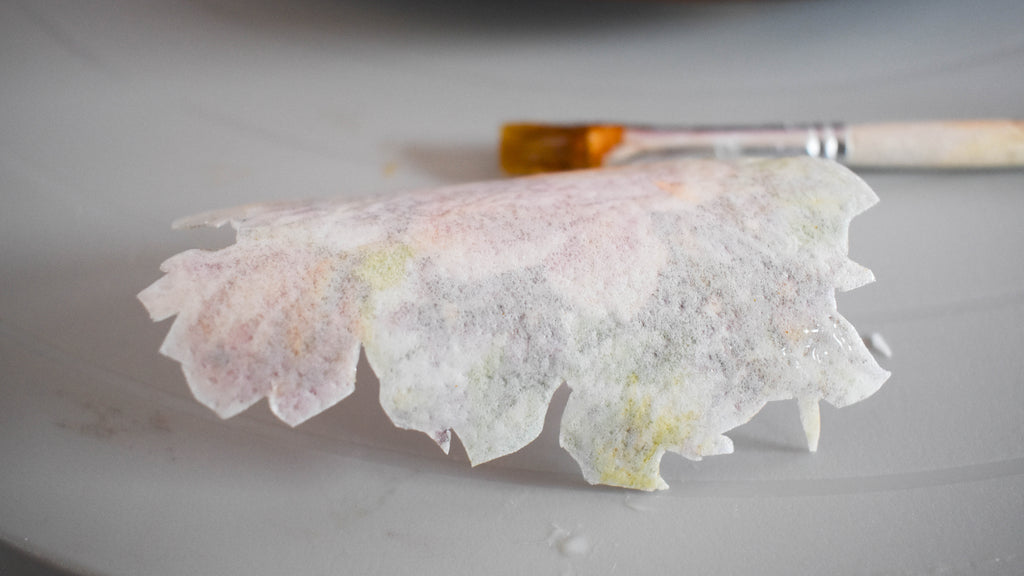
I searched for images that matched my color scheme, flower preferences and style (for me, peonies and roses with a Victorian or antique flavor) and found ones that I liked. I printed them onto wafer paper and painstakingly (although without any finger cuts!) cut out a whole mess of images! Look for images like these:
Start arranging and attach the images:
Now that I had all my paper cutouts ready, it was time to arrange the images and adhere them to the cakes. The Turntable Expander made it extra easy, because it gave me a ledge around the cake to place the cutouts and figure out where I wanted them.

To attach the images, I painted a thin coat of piping gel to the back of each image. I used piping gel instead of water for a couple of reasons – water makes wafer paper dissolve, and it makes the ink run. I didn’t want either of these things to happen.
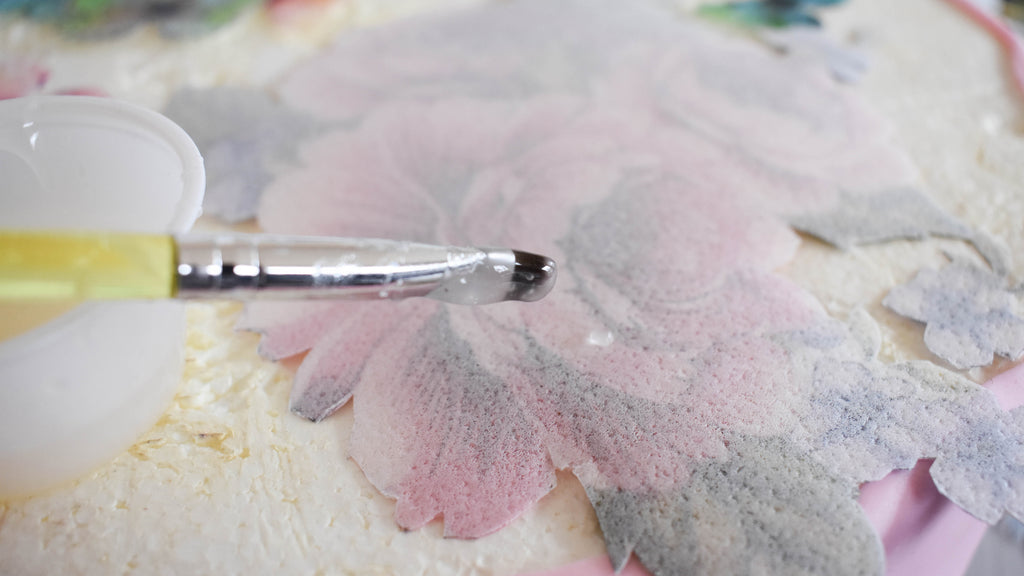
Once you coat the back of the wafer paper, it starts to soften, and then you can adhere the image to the cake, wherever you like. If the wafer paper feels stiff, use a little more piping gel or just use your paintbrush to massage the gel into the paper more, it will loosen up.
I attached the sticky side to the fondant and used a fondant smoother to help me press the images against the side of the cake and keep my fingers away from the fragile wafer paper.
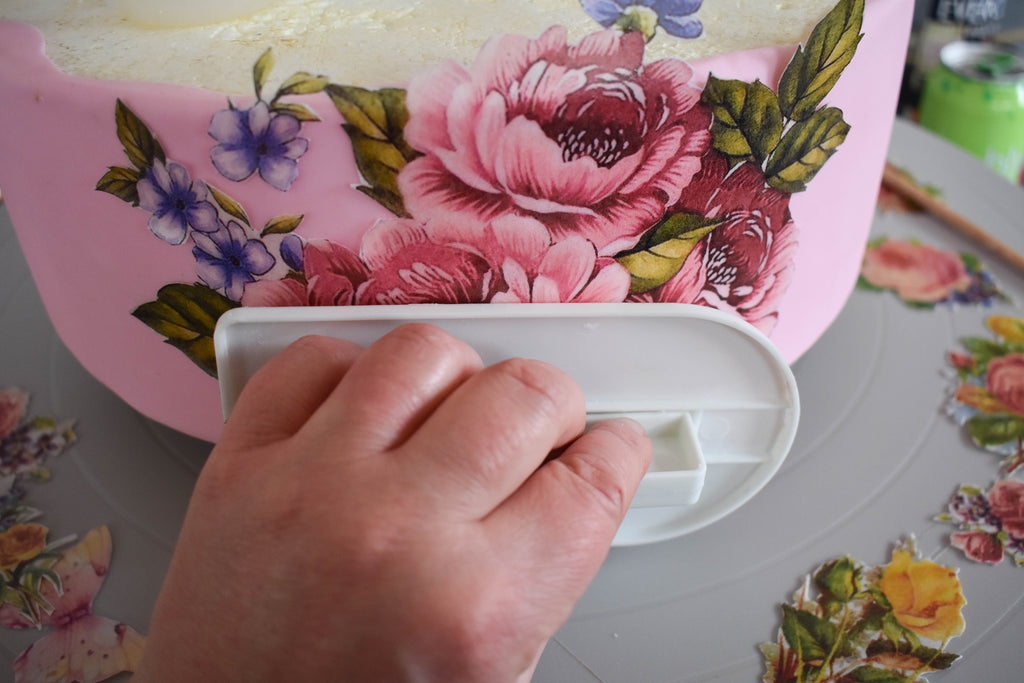
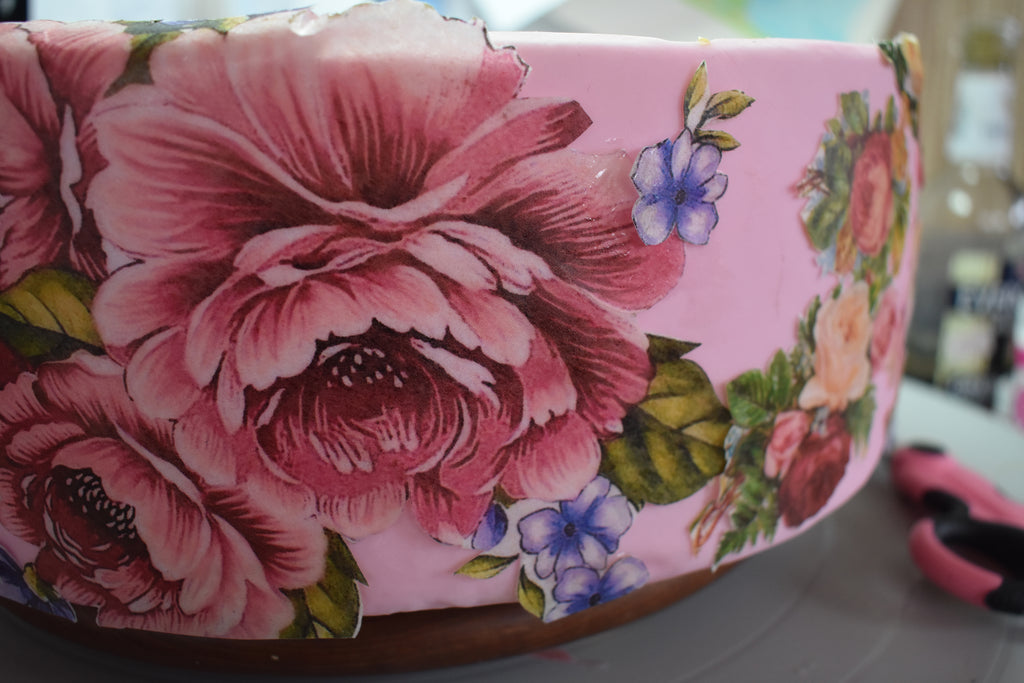
If you look at other decoupage art, usually you will find that images are overlapped, creating a new look from the existing image. This is where you can get creative – making your own garden, for example, made up of mixed images. In my case, I chose to spread the images out, because although I wanted the decoupage to stand out, I also wanted the color of the box to show through.
Shine it up:
Once the images were all adhered, I went around and made sure that all the edges were stuck down well. Once they dried a bit, I took my larger brush and some confectioners glaze, and I covered the whole cake and all the images with a coating of glaze.
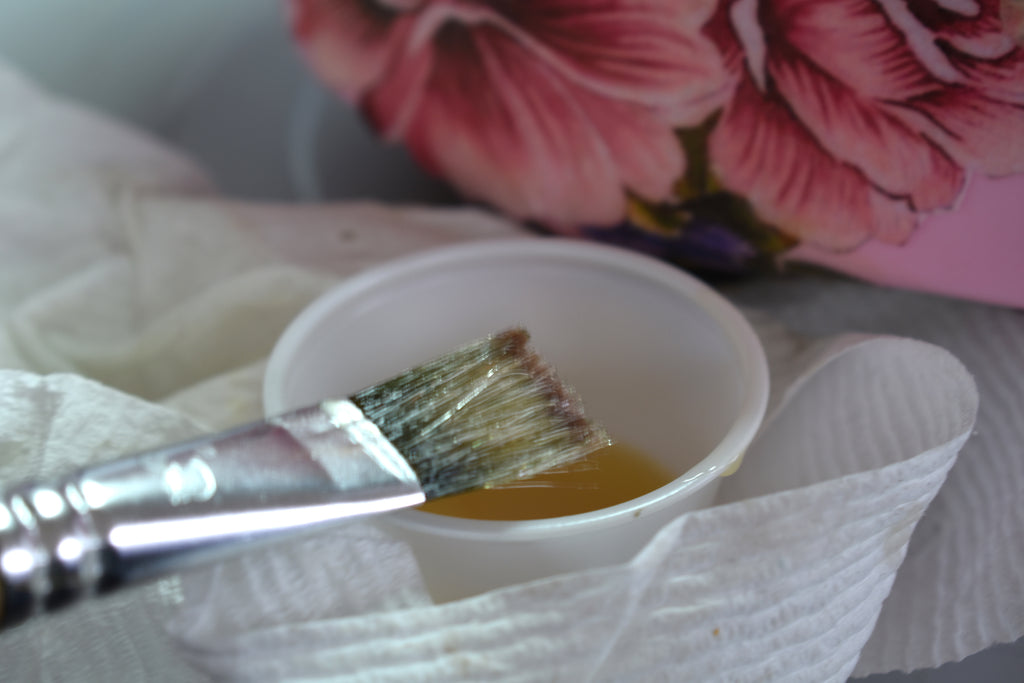
I tested the glaze on the front of the images before I did this to ensure that the image ink didn’t run, and although it ran a teeny bit, it did not distort the image, and gave it more of a vintage, aged look, which I liked. I recommend that you test your images with the glaze first as well, because there is nothing worse than you brushing on a whole mess of glaze and it ruining your hard work!
Notes about Confectioners Glaze:
This stuff is mega sticky and hard to get off of things like clothing, tables, etc. Invest in some glaze thinner as well so that you can rescue your brushes afterwards and clean up any stray drips. I also recommend using a disposable container to hold your glaze while you’re painting, unless you already have a designated glaze container.
Also – never put left over confectioner’s glaze down your sink, always dispose of it in the trash instead – your pipes will thank you.
Finishing touches:
To add a little more “glitz” (remember that theme?), I adhered some imitation gold leaf around the band of the box and covered that with some glaze as well. (My soft brush from Innovative Sugarworks was wonderful for smoothing down that gold leaf!)

I also printed out some patterns I found (yes, on Pinterest) onto fabric icing sheets and cut those up to look as if there were scarves trying to escape out of the box. You can use your imagination here and do all sorts of fun things to have peeking out of the box.

All done:
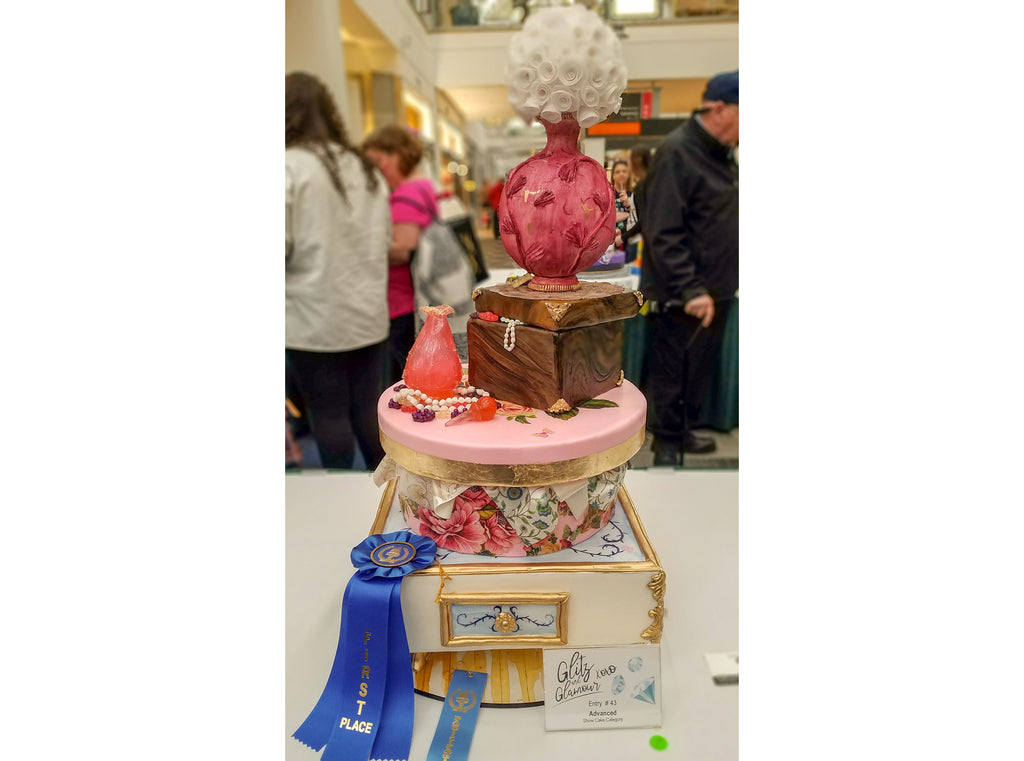
Now that the hat box was complete, it was ready to stack onto the vanity table base and have the jewelry box, perfume bottle and vase sit on top of it. I’m thrilled to tell you that even though I was originally stumped by the competition theme, there is a very happy ending to this story – my cake won 1st prize in my division! Wow…that was a shock and surprise, and I was so honored.
I hope you give this technique a try. It’s lots of fun to do, and it really makes an impression!
We hope you enjoyed Rose's tutorial on cake decoupage! It's a beautiful and striking visual technique that we don't see used very often. Maybe now that you've all seen it done, our Instagram feed will light up with decoupage!
If you want to see more of Rose's gorgeous work, follow her on Social Media:
Facebook: Shinyball Creations
Instagram: @shinyballcakes
Twitter: @shiny_ball
And make sure you keep an eye on her blog - ShinyBallCreations.com - for more great tutorials, instructions, and caking advice!